Sweet Potato Shepherd’s Pie
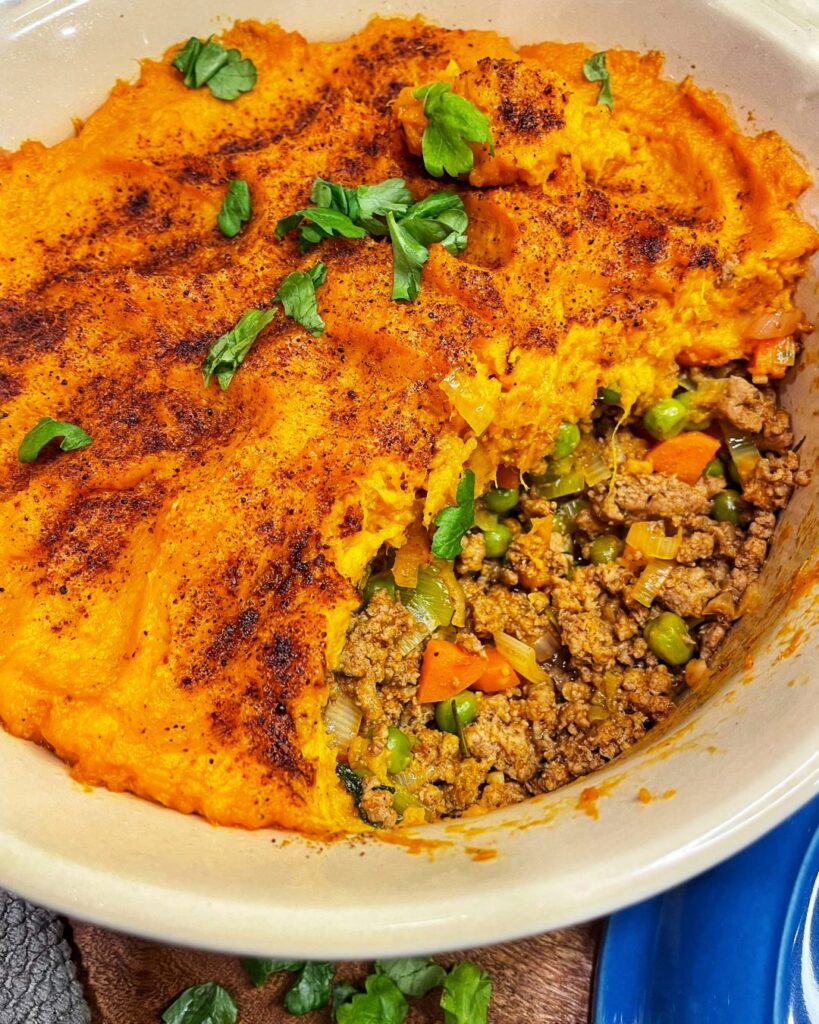
It’s that midway point in March where everyone is ready for spring to start but then we have that late winter Nor-easter. The past couple days have been cold, blustery, and snowy. With the sudden return of winter, and St. Patrick’s Day just around the corner, I was craving comfort food and something healthy so I raided my pantry and refrigerator and came up with my version of Sweet Potato Shepherd’s Pie. Easy to make, very adaptable to what you have in your fridge, and YES, healthy! If you have a cast iron skillet, this can be a one-pan meal. I chose to prep the filling in the skillet and transfer to a casserole dish. This dish reheats really well and is perfect to take for lunch! How to Make Sweet Potato Shepherd’s Pie Preheat Preheat the oven to 375°F. Wash sweet potatoes and poke several times with a fork. Place on a baking sheet and bake for one hour until tender. Prep Filling While the sweet potatoes are baking, prepare the shepherd’s pie filling. Heat Skillet Heat a large skillet over medium-high heat. Add a drizzle of olive oil. Sauté the ground turkey, breaking it up, until browned and cooked through. Add in the carrots, leeks, shallot, and frozen peas. Cook for another 8-10 minutes until carrots are tender. Make the Sauce Stir in the tomato paste, Worchestire sauce, chicken Better than Bouillon, chili powder, cumin, salt, and pepper. Mix in well. Add the fresh herbs and stir through. Turn off heat and set aside. Mash the Sweet Potatoes Take the sweet potatoes out of the oven and let cool enough to handle. Scoop out the flesh into a medium bowl. Mash well and add the sour cream, chili powder, cumin, salt, and pepper. Blend. Assemble Grease an 8×8 pan or 2.5 quart casserole with olive oil. Turn the ground turkey filling into the dish. Top with the sweet potato mash. Swirl the top with the back of a spoon. Sprinkle the top with a pinch of salt and dust with chili powder. Bake Bake at 375°F for 30 minutes. Let cool for 5-10 minutes before serving. Want to speed up dinner? Peel and cut sweet potatoes into cubes. Steam in the microwave. Don’t Like Chopping Veggies? Substitute 3 cups of frozen mixed vegetables for the carrots, leeks, and peas. Quick Chicken Flavor Use ½ cup of chicken broth instead of the water and bouillon. Substitute 2 tsp. dried herbs for the fresh (Parsley and thyme are good choices!). Meat Options Shepherd’s pie is traditionally made with ground lamb. I used ground turkey for this recipe. Any protein would work great – feel free to use what you have available. Ground beef and plant based meat crumbles are awesome choices! Healthy comfort food that the whole family will love! Seasoned ground turkey with veggies topped with creamy roasted sweet potatoes. Easy to make ahead! You might also enjoy
Crispy Baked Zucchini Fries
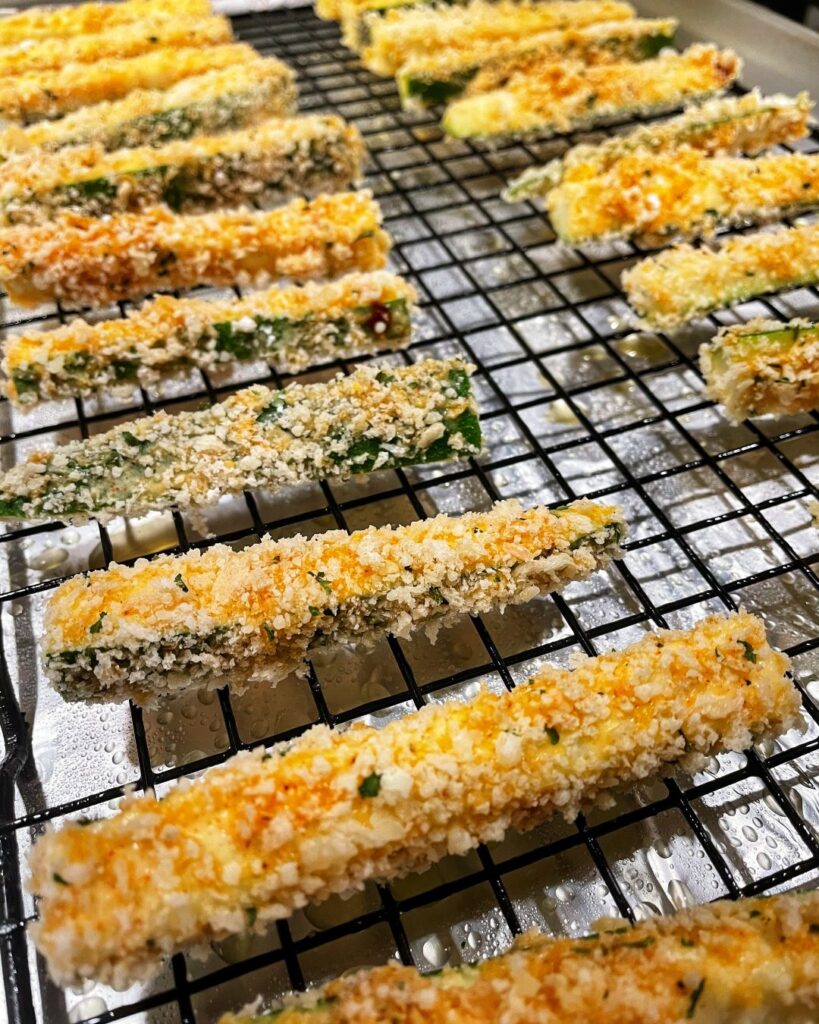
I am a texture girl – I love eating foods that are crunchy, tender, and full of flavor. But I am always looking for a way to get that deep fried crunch without the added fat and oil. Crispy Baked Zucchini Fries fit the bill perfectly! Using Panko crumbs and Parmesan cheese creates a light, airy, crunchy texture with tender zucchini inside. No deep frying, no turning halfway through the baking time. Just coat and bake! Using a baking rack allows the heat from the oven to evenly bake the zucchini fries without any oil! Perfect for a mid-afternoon snack or a healthy side with your meal! Pair with your favorite dipping sauce and enjoy! Some of my favorites are my Spicy Mayo, Southwest Ranch Dressing, and marinara! How to Make Crispy Baked Zucchini Fries Preheat the oven to 425°F. Line a large, rimmed baking sheet with aluminum foil (for easier cleanup) and a baking rack. Spray with non-stick spray and set aside. Wash and cut the zucchini into batons. In a shallow bowl, lightly beat the egg and water together. Add the paprika, salt, and pepper. Mix well. In another shallow bowl, combine the seasoned Panko crumbs and Parmesan cheese. Place the flour in a large Ziploc bag. Take half of the zucchini fries and place them in the bag. Seal shut and shake until the zucchini is well coated. Take the zucchini fries out and dip into the egg wash, coating thoroughly, and then dredge in the Panko crumbs. Press the crumbs on to coat. Put the breaded zucchini fries on the baking rack, leaving space in between each one. You want the hot air to circulate around the fries to crisp them. If you have a lot of fries, you can divide them between two baking sheets. Place in the oven and bake for 20-22 minutes until golden and crispy. Enjoy! Air Fryer Instructions Place zucchini fries in a single layer in the air fryer. Lightly spray with non-aerosol cooking spray. Cook for 10 minutes at 400°F until golden and crispy. Perfectly crisp outside and tender inside. These addictive zucchini fries bake up crisp and crunchy without any oil! Great with burgers and chicken! You might also enjoy
Southwest BBQ Chicken Crunchwraps

My husband loves all things spicy and crunchy. So I created this spinoff of a Taco Bell Crunchwrap using juicy BBQ chicken, gooey Colby Jack cheese, and Fritos, topped with a beautiful green Roasted Poblano Crema and bright, fresh Pineapple Salsa. It’s the perfect balance of sweet, tangy, crunchy, and slightly spicy. You can make everything ahead of time so when you are ready for crunchwraps, it is only a few minutes until it is hot and crispy on your plate! Great for a casual weekend meal! How to Make Southwest BBQ Chicken Crunchwraps Prepare the Roasted Poblano Crema: Broil Set the oven to broil. Line a rimmed baking sheet with parchment paper. Slice the poblano peppers in half and remove seeds and ribs. Lay skin side up on the baking sheet. Place in the oven on the middle rack and broil for 5-6 minutes. Watch closely to prevent burning. You want the skins to blister. STeam Remove the peppers and place in a bowl covered with plastic wrap for 15 minutes to steam. The steam will loosen the skins. Peel off the skins and roughly chop up the peppers. Blend Place peppers, onion, garlic, cilantro, and Greek yogurt in a blender or food processor. Purée until fairly smooth. Add 1-2 Tbsp. of milk to thin out, if needed. Season with salt and pepper to taste. Set aside. Prepare the Pineapple Salsa: Chop and Toss Toss all of the ingredients in a medium bowl. Season with salt to taste. Set aside. Prepare the Crunchwraps: Layer Lay a burrito size flour tortilla flat. In the center, add ½ cup of shredded Colby Jack cheese. Top with ½ cup BBQ chicken and a handful of Fritos. Fold Start folding the side of the tortilla closest to you towards the center. Using both hands, fold the edges down and rotate clockwise, little by little as you continue folding. You should be able to fully fold and cover the top of the crunchwrap with about 5-6 folds. Brown Heat a nonstick skillet over medium heat. Drizzle with a little high temperature cooking oil. Carefully place the crunchwrap seam side down, pressing lightly to help seal the seams. Cook for about 2 minutes until golden brown. Carefully flip the crunchwrap and cook the other side for another 2 minutes until golden brown and crispy. Assemble Assemble and cook the remaining wraps. Cut and serve! Transfer the Southwest BBQ Chicken Crunchwraps to a cutting board. Cut in half and drizzle with the Roasted Poblano Crema and top with a few spoonfuls of Pineapple Salsa. Enjoy! Juice BBQ chicken, Colby Jack cheese and Fritos stuffed inside a crispy flour tortilla, topped with roasted poblano crema and fresh pineapple salsa! You might also enjoy
Crispy Baked Chicken Milanese
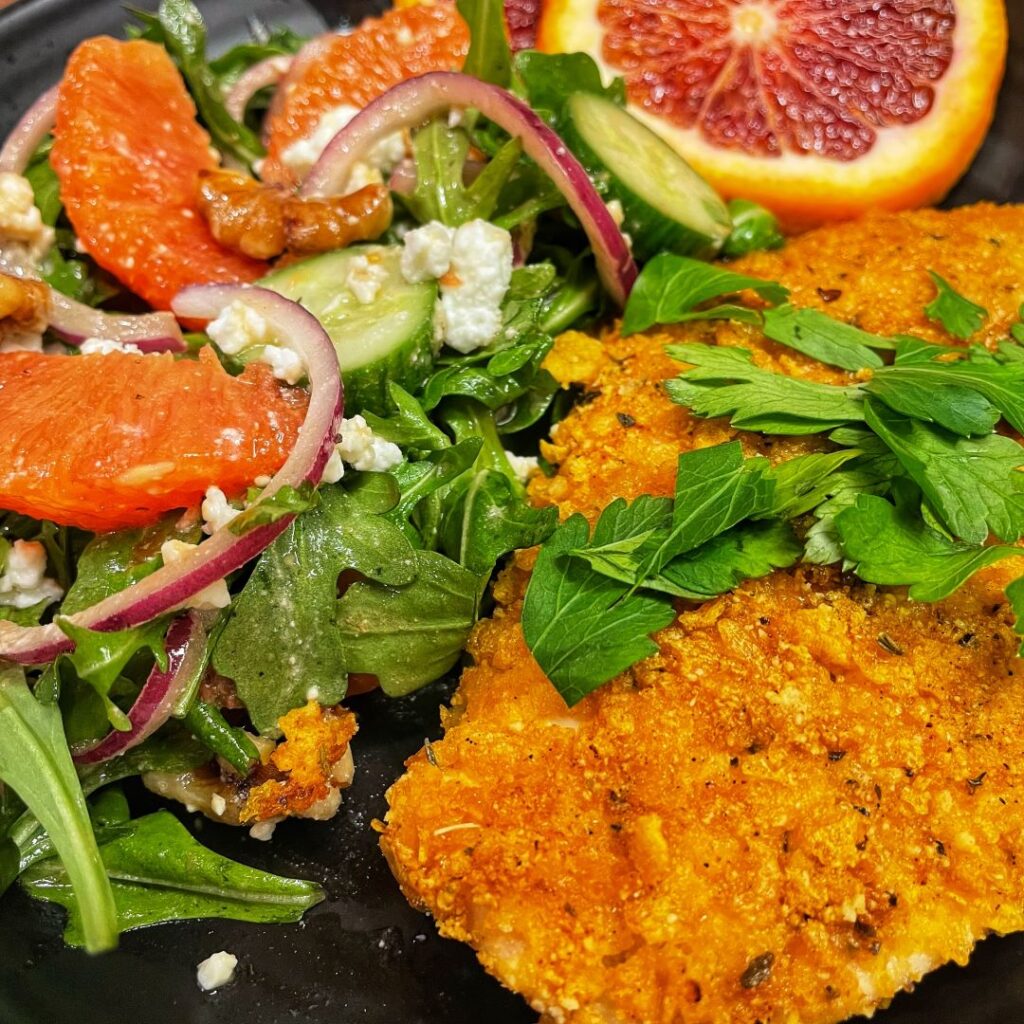
Crispy Baked Chicken Milanese is perfect for an easy, weeknight meal! Perfect with a peppery arugula salad, roasted potatoes, or macaroni and cheese – it’s a guaranteed winner in your household! This version of Chicken Milanese uses crushed cornflakes and almond flour to create that crispy, deep fried taste, but is oven-baked instead! I love fried chicken in all its glorious forms: chicken nuggets, popcorn chicken, chicken wings, you name it. But…I DO NOT love the mess it leaves in the kitchen. The oil splatters, the messy skillet, and that stale “fried” smell that can linger until the next morning. You know EXACTLY what I mean! So – I set out to make a healthier, baked version that still has that satisfying crunch of a great fried, breaded chicken cutlet. Crispy Baked Chicken Milanese for the win! You can double this recipe and use it for meal prep too! Bake ahead and use for lunches on top of salad! I love to make an Orange, Walnut and Arugula Salad or some awesome roasted veggies like Holiday Roasted Vegetable Medley, for quick, flavorful, and nutritious work lunches! Chicken tenderloins would be a great substitution too! Kids will love how crunchy their baked chicken fingers are! I’m hungry! Let’s cook together! How to Make Crispy Baked Chicken Milanese Preheat oven Preheat the oven to 425°F. Line a rimmed baking sheet with parchment paper. Set aside. Breading Station Whisk together the egg, ½ tsp. salt, ½ tsp. pepper, and water in a shallow dish. In another shallow dish, combine crushed corn flakes, almond flour, paprika, cayenne pepper, sea salt, and black pepper. Coat Chicken Take each chicken cutlet and dip it into the egg wash, coating both sides. Then dredge it in the corn flake mixture, coating both sides. Press the cornflake mixture into the chicken. Lay it on the baking sheet. Coating Continue until you have coated all of the chicken cutlets. You will have approximately 4-5 cutlets. Spritz with olive oil Lightly spray both sides of the breaded cutlets with the non-aerosol olive oil. Place in the oven and bake for 10 minutes. Flip the cutlets over and continue baking for an additional 12-15 minutes until chicken is cooked through to an internal temperature of 165°F. SErve Serve with your favorite sides and enjoy! Try serving this with Orange, Walnut and Arugula Salad! It’s sooo good! Note You can make your own chicken cutlets by slicing 2-3 boneless chicken breasts in half, lengthwise (butterfly) and pounding out to about a ½” thickness. To save time, I usually buy the prepared chicken cutlets at the store. Chicken cutlets seasoned, breaded, and baked to golden, crispy perfection! You might also enjoy
Corey’s Chorizo Meatloaf with Spicy Maple BBQ Glaze
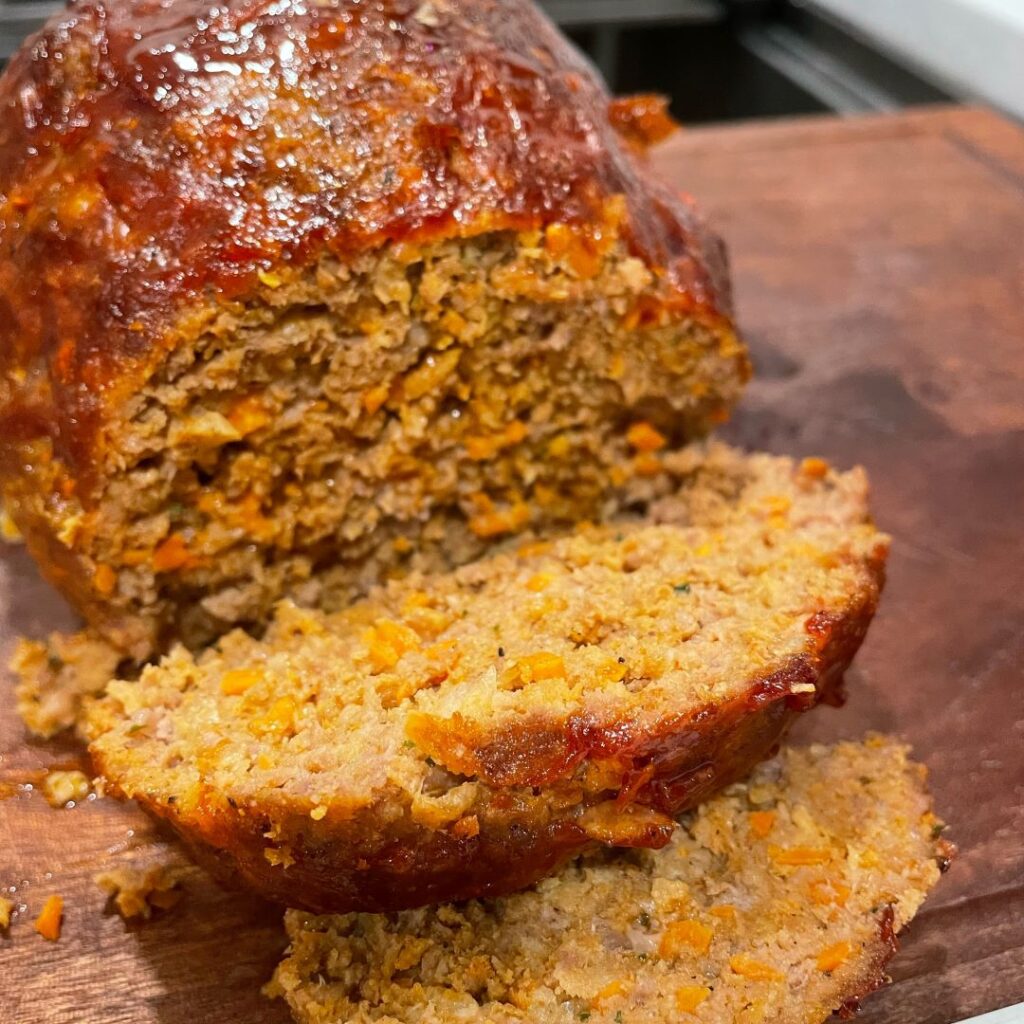
My very favorite meatloaf is a recipe that my husband created. It combines chorizo sausage with ground beef to create an intensely flavorful meatloaf that is finished off with a tangy, slightly spicy glaze that just takes it over the top! If you are looking for a new twist on an old favorite, look no further – you have found it! Enjoy! How to Make Corey’s Chorizo Meatloaf with Spicy Maple BBQ Glaze Preheat Preheat the oven to 400°F. Grease a loaf pan and set aside. Chop Veggies Finely chop the carrot, celery, and onion in a food processor. Mix meatloaf ingredients together In a bowl, mix together the finely chopped carrot, celery, onion with the chorizo, ground beef, garlic, black pepper and egg. Add in the Panko breadcrumbs. You may need a little more or a little less to get that “meatloaf” consistency. Bake Shape into a meatloaf and place in a greased loaf pan. (We have a meatloaf pan that drains the fat underneath while cooking.) Sprinkle the top of the meatloaf with some sea salt. Place in the oven to bake at 400°F for an hour. Make the Spicy Maple BBQ Glaze Meanwhile, make the Spicy Maple BBQ Glaze. Put the BBQ sauce, ketchup, and spicy maple syrup in a small bowl. Mix well. (Double the amount if you want some to dip your meatloaf.) Baste meatloaf After one hour, use a basting brush and generously glaze the meatloaf. Put back into the oven until temperature reads 160°F. (approximately 5-15 minutes more depending on your oven) Let Rest Remove meatloaf from the oven and allow it to rest for 10 minutes before slicing. Serve with additional Spicy Maple BBQ Glaze. An intensely flavorful meatloaf that combines chorizo sausage and ground beef. Finished off with a tangy, slightly spicy maple BBQ glaze that takes it over the top! You might also enjoy
Roasted Tomato and Feta Frittata

After the holiday rush, I wanted something easy and delicious for breakfast…with a reasonable amount of veggies to make it healthy. What to make??? Frittata! A great frittata is creamy, custardy, and full of veggies. It should not be dry or bland. They are also great to use up the bits of veggies in your refrigerator for an easy brunch recipe or weeknight meal. Frittatas also are great to pack and reheat for work lunches. Serve it with a side salad and you are good to go! My version is a hands-off, baked frittata filled with sweet, roasted cherry tomatoes (Look at those golden beauties from my garden!), chopped kale, and creamy feta cheese. Sooo good!!! How to Make Roasted Tomato and Feta Frittata Wilt veggies Warm a small pan over medium heat. Drizzle with olive oil and add kale and minced garlic. Add a pinch of red pepper flakes. Sauté for 1-2 minutes until kale is wilted. Add in the roasted cherry tomatoes to combine. Sauté for one more minute. Preheat Preheat the oven to 400°F. Spray an oven-safe skillet with cooking spray. Add the roasted tomatoes, kale, ¾ of the feta (reserve a couple tablespoons to sprinkle on top), and the basil. Whisk eggs In a large bowl, whisk together the 8 eggs, heavy cream, and sea salt. Pour the egg mixture over the vegetables. Bake Bake for 20-25 minutes until the eggs are set. Remove from the oven and sprinkle the reserved feta cheese on top. Let the frittata cool for 5 minutes. Slice and garnish Slice into 6 pieces and serve with a drizzle of balsamic glaze and additional basil. Enjoy! A baked frittata filled with sweet, roasted cherry tomatoes, chopped kale, and creamy feta cheese! You might also enjoy
