
Whipped Feta and Balsamic Cherry Dip
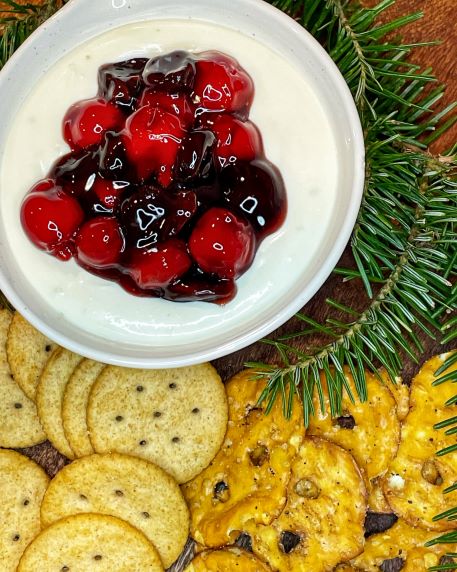
I love appetizers. It is a known fact in our family. If given the choice to have an entrée vs. several small plates, I’ll choose several small plates every time. It’s something about having a wide variety of dishes to choose from – I’m hooked! Maybe because I’m half Korean??? Korean meals are often served with several small side dishes called banchan, but that is a lesson for another day. I digress. Lol! When you need effortless appetizers, this dip is perfect! Easy to make, beautiful presentation, and most important – DELICIOUS! How to Make Whipped Feta and Balsamic Cherry Dip Balsamic Cherry Topping Add Add one cup of cherry pie filling, the dried cherries and the balsamic glaze to a small bowl. Mix well and set aside. Premium Cherry Pie Filling Try to use a premium cherry pie filling that does not have high fructose corn syrup. You will get a richer, cherry flavor. Whipped Feta Dip Soften cheese Set feta cheese and cream cheese out on the counter for at least an hour to come to room temperature. *This step is important – if your cheese is cold, it won’t be smooth and creamy when you whip it. Blend Add both cheeses to your food processor. Pulse a few times to start to combine the cheeses. Add the lime zest. Pulse again to combine. Add the water, a tablespoon at a time, until the dip is whipped and fluffy. *If you prefer a sweeter dip, add honey.* Spread dip Spread the whipped feta on a small serving dish or shallow bowl. Top with the balsamic cherry topping. Cover and refrigerate You can cover and refrigerate until you are ready to serve. Let it come to room temperature – approximately 30 minutes. serve Serve with Ritz crackers, pretzel crisps, or your favorite dippers. Whipped feta dip with a delicious balsamic cherry topping! You might also enjoy
Holiday Roasted Vegetable Medley
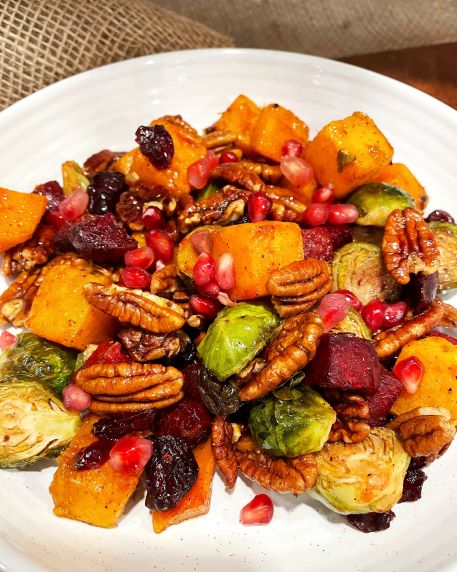
I am really excited about this dish! I saw several roasted vegetable recipes for the holidays and decided to create my own version. It does not disappoint! Vibrant colors, bright, fresh flavors, and tons of healthy vegetables and nuts make you feel so good eating this! Another great thing about this recipe is that you can make most of it ahead of time. Roast the vegetables, toast the nuts, and make the dressing the day before. Then just warm through, add the nuts, toss with the dressing, and serve! Perfect for Thanksgiving Day when you want time to spend with your guests! How to Make Holiday Roasted Vegetable Medley Preheat Preheat the oven to 375°F. Line a large rimmed baking sheet with parchment paper. Prep Veggies Wash and chop the Brussel sprouts, butternut squash, and beets. Keep each vegetable separate – they may require different roasting times. Toss Place Brussel sprouts in a medium bowl and drizzle with 1 Tbsp. olive oil. Season with salt and pepper. Toss to coat. Place on the baking sheet. Repeat with the squash and beets. Roast Roast for 45 minutes or until fork tender, flipping the vegetables halfway. Make dressing In the meantime, make the Blood Orange Balsamic Dressing. Whisk all ingredients together in a small bowl. Set aside. Toast nuts Heat a skillet over medium heat and add the 2 cups of pecan halves. Stir constantly for 3-5 minutes until they toast (they will darken slightly) and have a nutty aroma. Immediately remove from the heat and set aside. Assemble dish Once the vegetables are fork tender, place them in the large bowl. Add the dried cranberries and pecans. Toss to coat. Add half of the dressing and toss again. Add more dressing as needed. Garnish Pour into your serving dish and sprinkle with pomegranate arils. Serve warm or room temperature. Time Saving Tips To save prep time, you can buy precut vegetables. Adjust roasting times accordingly. Veggie Substitutions Substitute with your favorites – try carrots, sweet potatoes, or parsnips. Can I used flavored balsamic vinegar? Flavored, aged balsamic vinegars add great flavor to this dish – try a fig balsamic or pomegranate balsamic! Colorful roasted vegetables, toasted pecans, and dried cranberries are tossed witha blood orange dressing for a delicious side dish! You might also enjoy
Roasted Delicata Squash
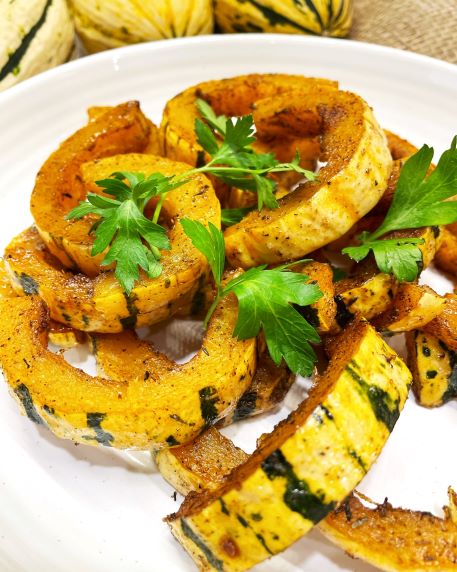
With less than 2 weeks until Thanksgiving, I wanted to share one of my favorite fall side dishes! Roasted Delicata Squash complements any fall meal. With its beautiful, scalloped edges and bright yellow and green skin, it just feels festive! Roasted Delicata Squash is perfectly caramelized on the outside and tender on the inside. Its flavor is similar to sweet potatoes. Unlike other winter squash, Delicata squash is smaller, with a thin, edible skin. They have a beautiful, scalloped edge and lend themselves to sweet and savory spices. In this recipe, there is a perfect blend of cumin, cinnamon, and maple to bring out the best flavors! Enjoy! How to Make Roasted Delicata Squash Preheat Preheat the oven to 375°F and line a large, rimmed baking sheet with parchment paper. Clean and slice squash Wash the delicata squash. Slice off the stem and bottom. Stand the squash up and slice in half, lengthwise. Scoop out the seeds with a spoon. Place cut side down and slice into ½” half moons. Toss with olive oil and maple syrup Place the sliced delicata squash in a large bowl. Drizzle with the olive oil and maple syrup. Toss to coat. Add the spices and toss again. Bake Spread the squash on the baking sheet in a single layer. Bake for 25 minutes, flipping the squash halfway. The squash will be golden and tender. Serve and enjoy! Perfectly roasted delicata squash is a delicious side dish! Tender on the inside and caramelized on the outside. It’s quick and easy to prepare and will complement any fall meal! You might also enjoy
Kielbasa, Cabbage & Noodles (Haluski)
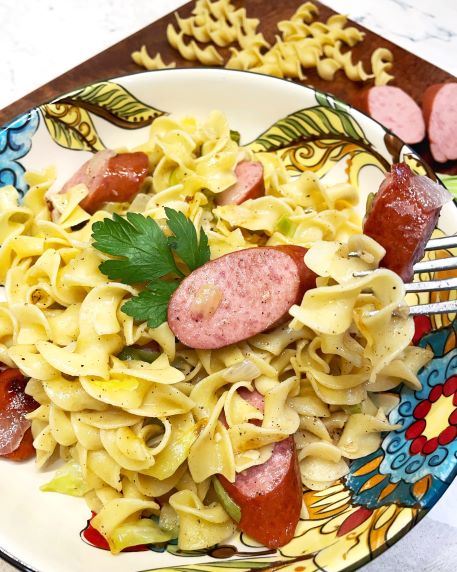
It’s that super, busy time of the year when the days are shorter and we need to get dinner on the table. Try this one pot dish for an easy, weeknight meal. Haluski is one of the easiest meals to make with only a handful of ingredients. What is Haluski? Haluski is a traditional Polish dish with cabbage and buttery egg noodles that is very popular in Pennsylvania. Many Eastern European and Pennsylvania Dutch variations are also available. You can find it on the menu at many family-owned diners and restaurants. When cabbage is in season, I make this at least one or two times a month. It is a great way to use up extra cabbage, feeds a lot of people, and it’s very inexpensive to make. The cabbage and onions mellow into a delicious blend when sauteed with the butter and mixed with the egg noodles, while the kielbasa gives you a satisfying garlic flavor. My version adds turkey kielbasa (leaner and more calorie friendly) but feel free to use traditional kielbasa or omit altogether for a hearty, meatless dish. How to Make Kielbasa, Cabbage & Noodles (Haluski) Boil water Bring a large pot of salted water to a boil. Sauté onions and cabbage In a large skillet, melt the 6 Tbsp. of butter over medium heat. Add the onion and cabbage. Sauté the onions and cabbage for 8-10 minutes until the onions are translucent and the cabbage begins to soften, but not brown. Add kielbasa Add the minced garlic and turkey kielbasa to the skillet. Sauté for an additional 8-10 minutes until the cabbage is very tender. The cabbage and onions will turn slightly golden. Cook noodles While the cabbage is cooking, add the noodles to the boiling water and cook according to the package directions. Assemble and serve Drain the noodles and add to the skillet. Toss well to mix the noodles with the cabbage mixture. Season with salt and a generous amount of black pepper. Heat through. Serve immediately and enjoy! Buttery egg noodles are tossed with kielbasa and cabbage in this traditional Polish dish! You might also enjoy
The Best Gingersnaps
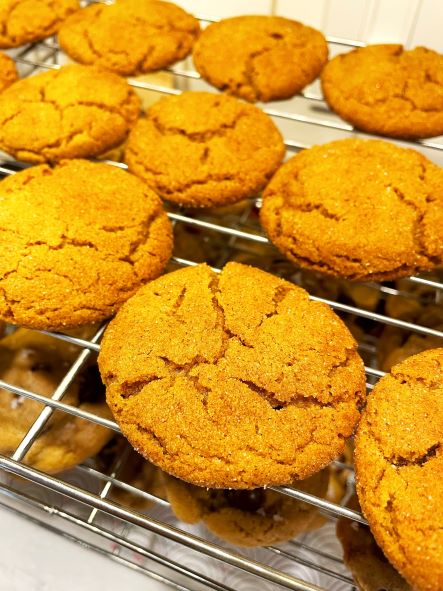
I love when the holidays arrive! It’s a time for families to get together and share memories. The nostalgia isn’t complete without the aroma of fresh cookies baking in the oven. In my family, cookie baking used to start as soon as the leaves changed colors. I would come home from school to the smell of cookies and I could barely wait for them to cool enough to stuff in my mouth. Lol. As my mom made each kind of cookie, she would tell me where the recipe came from, why she liked it, and would let me lick the spoon. I know, I know, we aren’t supposed to eat raw cookie dough. But…things were less complicated back then. When I had my own family, I continued the cookie baking tradition but added several more cookie recipes that were shared with me through extended family, the elderly ladies at church, and close friends. Over the years, the recipes have been tweaked and adjusted. Now, each year, we have a Cousins’ Cookie Baking Day, filled with tons of laughs, great drinks, matching t-shirts, and LOTS of cookies! One of the must-have recipes we make are The Best Gingersnaps! These cookies are full of that addictive ginger flavor and that perfect balance of crisp and chewy. We always make at least a double batch because we eat them as fast as they come out of the oven. Hahaha! I hope you and your family enjoy them as much as we do! How to Make The Best Gingersnaps Preheat Preheat oven to 350° F. Line baking trays with parchment paper. Make cinnamon sugar Prepare cinnamon sugar and set aside in a small bowl. Blend dry ingredients Whisk together flour, ginger, cinnamon, cloves, nutmeg and baking soda in a medium bowl. Blend wet ingredients Beat shortening in a large bowl until creamy. Gradually add white sugar, then the egg and molasses. Add ⅓ of the flour mixture at a time. Blend after each addition, just until combined. Scoop onto baking sheet Using a medium cookie scoop (2 Tbsp.), scoop dough and roll into 2” balls. Roll each ball in the cinnamon sugar and place 2” apart on the cookie sheet. Bake Bake for 10-11 minutes until the tops are puffed and cracked. Cool cookies for 1 minute on a cookie sheet and then transfer to a wire rack to cool completely. The cookies will flatten out as they cool. Store Store in an airtight container. Best made a day ahead to enhance the flavors. They will keep for several days. A beautiful, crackle-top cookie that is full of that addictive ginger flavor. The perfect balance of crisp and chewy – you can’t eat just one! You might also enjoy
Roasted Butternut Squash Mac and Cheese
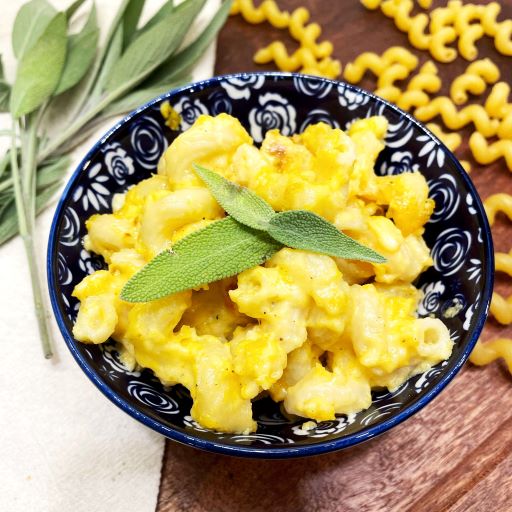
November is here! You know what that means??? It’s time for all kinds of comfort foods! When I think of comfort foods, I think of casseroles, soups, stews, AND seasonal vegetables! This week I took one of my favorites – Macaroni and Cheese – and incorporated another one of my favorites – Butternut Squash – for nutritional punch. Roasted Butternut Squash Mac and Cheese takes ooey, gooey, cheesy goodness to the next level! This is also a great way to sneak in some extra veggies for the kids in your family. It is a great meatless main dish and would be an awesome side dish at your Thanksgiving feast. Serve with some steamed broccoli to make the perfect meal. How to Make Roasted Butternut Squash Mac-n-Cheese Butternut Squash Cubes Preheat the oven to 400° F. Place butternut squash cubes and minced garlic on a large baking sheet. Drizzle with olive oil and toss to coat. Season with salt and pepper. Roast for 25-30 minutes until tender. Pasta While butternut squash is roasting, cook pasta in a large stock pot according to package directions. Drain well and set aside. Sage Leaves In a separate sauté pan, heat 1 Tbsp. olive oil at medium heat. Add sage leaves and sauté for 1-2 minutes until crispy. Transfer the sage leaves to a paper towel lined plate and set aside. Butternut Squash Once butternut squash is tender, remove from the oven and let cool on the baking sheet for about 5 minutes. Scoop the squash into a blender or food processor along with the ½ cup of heavy cream. Purée until smooth. Sauce Heat the same large stock pot over medium heat and add butter. Once melted, whisk in flour and nutmeg. Cook for 2-3 minutes, making a light roux. Gradually add in the 2 cups of milk and whisk until mixture is smooth. Cook for another 5-6 minutes until the sauce has thickened. Add 1 cup of cheddar cheese and 1 cup of Gruyère cheese along with the butternut squash mixture. Stir until the cheese has melted and the sauce is smooth. Taste and season with salt and pepper as needed. Add pasta and toss to coat. Prepare to bake Grease a 2 quart casserole dish. Pour the mac and cheese mixture into the dish. Sprinkle it with the remaining ½ cup of cheddar cheese. It’s Bake Time! Bake for 25-30 minutes until the mac and cheese is bubbling. Broil for an additional 2-3 minutes to brown the top if desired. Garnish & Serve Garnish with the crispy sage leaves and serve. Enjoy! Creamy mac and cheese with a fall twist! Good-for-you roasted butternut squash and crispy sage elevate this mac and cheese. A perfect meatless dish! You might also enjoy