
Roasted Cherry Tomatoes
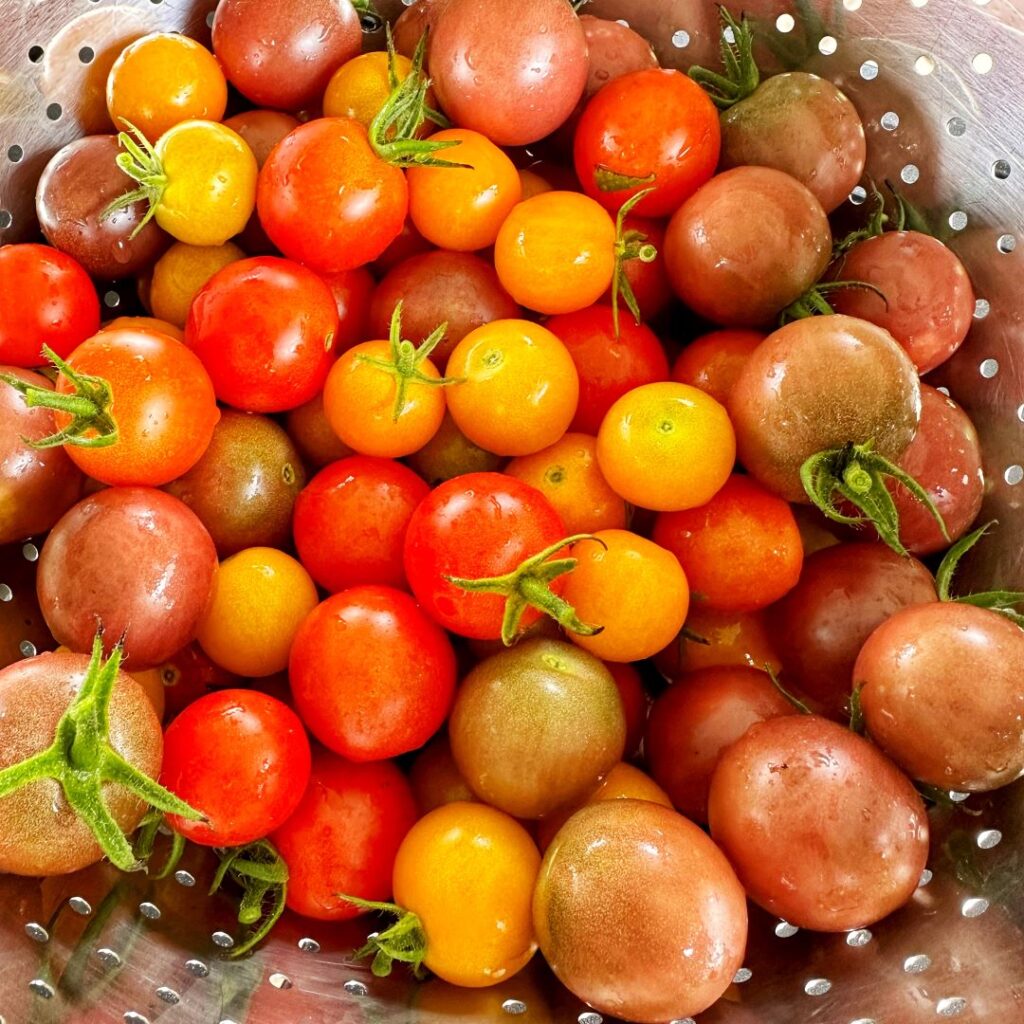
Roasted cherry tomatoes are a delicious base to many different recipes. Try this recipe for your next meal. Perfect side with chicken or a base for my Super Easy Creamy Roasted Tomato Sauce, frittata, or pasta dish!
3-Ingredient Oreo Truffles

The holiday season feels like it rushed by in a blur of family gatherings, magnificent meals, and incredible desserts. I had all good intentions of adding more blog posts and next thing I knew, it was January! So, as I take time to reflect on all the wonderful memories, I sit here with my cup of tea and my Oreo Truffles. My awesome mother-in-law had stopped by with a container of Oreo Truffles that she had made with her sister. We took one bite and fell in love! Lol! She shared her recipe and I made a batch for my cousin’s New Year’s Eve party. They were a huge hit and several people begged for the recipe. Oreo Truffles are completely decadent, easy to make, and require no baking! Even better – there’s only 3 ingredients AND you can make them days ahead of an event! How to Make 3-Ingredient Oreo Truffles: Use a food processor to chop cookies into fine crumbs. Add cream cheese and process until fully combined. Line a baking sheet with parchment paper. Use a small cookie scoop or tablespoon to scoop and roll the mixture into 1” balls. You will get approximately 24-36 balls. Place the baking sheet in the refrigerator and chill for 30 minutes. Melt the chocolate wafers in the microwave according to the directions on the package. Use a fork to dip each ball into the chocolate and place back on the baking sheet. Let the chocolate set for a few minutes, then drizzle with contrasting chocolate or top with your favorite garnish. Refrigerate for another 10 minutes to set the chocolate. Store in a tightly sealed container in the refrigerator for up to a week. Notes You can use semi-sweet chocolate chips instead of chocolate melting wafers. Melt in a small microwave safe bowl according to package instructions. Want even MORE decadent truffles? Try using 4 oz. of cream cheese and ½ cup of Nutella. 3-Ingredient Oreo Truffles are easy, bite-sized, no-bake truffles perfect for holiday parties and cookie exchanges! You might also enjoy
Minestrone Soup
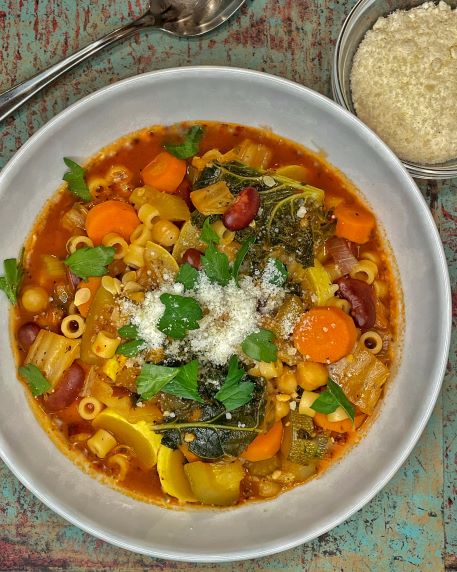
This minestrone soup recipe is a completely customizable version of the traditional Italian vegetable soup. It is an easy, weeknight meal that is nourishing and delicious. Serve with a loaf of crusty bread for a complete meal! When the weather gets cold and snowy, I love putting a big pot of soup on the stove. The aroma fills the house and just makes things feel cozy and warm! Don’t be intimidated by the list of ingredients. Minestrone is a soup that was created to use up leftover vegetables. Feel free to substitute and use whatever vegetables you have at home! Normally, I use baby spinach, but for this soup I used kale. If you don’t have garbanzo beans, use cannellini or a second can of kidney beans. Green beans would work great in this soup too! Once you have all of your vegetables cleaned and chopped, making the soup is very easy! Some Soup Tips This is a very affordable soup and extremely versatile. You can mix and match any seasonal vegetables that you have available. Don’t have pasta? You can swap in farro or barley. If you have leftovers, the ditalini pasta will absorb the broth. Feel free to add a splash of broth or V8 when you reheat the soup. The soup tastes even better the next day and is perfect to pack for lunch! You can freeze individual portions that will last up to 3 months in the freezer. How to Make Minestrone Soup: Heat a large stockpot over medium heat. Add olive oil. Add the garlic, onions, carrots, celery, and cabbage. Sauté for 5-6 minutes until vegetables soften. Add the broth, V8 juice, canned beans, zucchini, and yellow squash. Mix well. Add the Italian seasoning, pesto, bay leaves, bouillon, and red pepper flakes. Bring to a simmer and reduce heat to medium-low. Simmer for 30 minutes, stirring occasionally. In a separate pot, cook ditalini pasta according to package directions. Drain and set aside. Add the fresh baby spinach or kale and cooked ditalini pasta. Simmer for an additional 10 minutes. Season with salt and pepper to taste. Serve with parmesan cheese. This minestrone soup is an easy, weeknight meal that is nourishing and delicious! Serve with a loaf of crusty bread for a complete meal. You might also enjoy
Pork and Shrimp Spring Rolls

One of my very favorite foods is a perfectly crispy spring roll! I do not eat many fried foods, but this is one that I cannot resist! There is something about that light, crispy wrapper with the savory pork and shrimp filling that is sooo good! Once you make your own, you will choose them over takeout every time! Do not get intimidated by the process – it’s a bit time consuming – but so worth it! Making spring rolls is a fun activity to do with friends and family. When everyone sits down to roll spring rolls, it goes quickly and you can make large batches and freeze them to be enjoyed later. I hope you’ll try it! How to Make Pork and Shrimp Spring Rolls 1. Prepare the Filling Slice and grate all of the vegetables. Set aside. Finely chop raw shrimp in a food processor and combine with the ground pork. Set aside. Heat 1 Tbsp. of oil in a wok or deep skillet on medium-high heat. Add the pork and shrimp mixture along with the minced ginger and garlic. Sauté for 2-3 minutes until it is mostly done. Use your spatula to break up the meat into small pieces.. Transfer to a plate. Add the remaining Tbsp. of oil to the wok. Add the carrots, cabbage, and green onions. Sauté for 2 minutes until vegetables soften. Add the pork and shrimp mixture back in. Add the oyster sauce, salt, sugar, and pepper. Stir to mix well. Spread the filling over a large baking sheet to cool for approximately 10 minutes. You do not want hot filling for your spring rolls. They will get soggy and difficult to roll. 2. Spring Roll-Making Station Set up your spring roll station. You want to have a large baking sheet to put your rolled up spring rolls. Have a light towel to cover them so they do not dry out while you are rolling the rest of the spring rolls. Have your spring roll wrappers ready and covered with a towel. Spring roll wrappers are very thin and can dry out quickly. Covering them with a towel will keep them moist and pliable. Scoop your cooled filling into a bowl. Lightly beat the egg in a small bowl and have it near your spring roll station with a pastry brush. 3. Rolling Spring Rolls Take one spring roll wrapper and lay it on the counter in a diamond shape with the corner pointed at you. Scoop about 2 Tbsp. of filling and place it on the bottom third of the wrapper. Gently fold over the bottom corner and start rolling your spring roll. When you get to the center (halfway) of the wrapper, stop. Fold in the left and right sides of the wrapper towards the center. Brush the top corner of the wrapper with the egg wash to help seal it tightly. Finish rolling the spring roll and place on the baking sheet, seam side down. Cover with the towel to keep moist. Repeat the process with the remaining wrappers and filling. 4. Cooking Spring Rolls Line a large baking sheet with paper towels to absorb the excess oil from the spring rolls. Fill a small stockpot or 2 qt. saucepan with about 2” of high temperature cooking oil. Or if you have a deep fryer, you can use that. Heat the oil over medium-high heat for several minutes. To test if the oil is hot enough, stick a bamboo skewer or chopstick into the oil. If you see tiny bubbles rapidly bubbling around the skewer, it is ready for frying. Using a pair of tongs, gently add 3-5 spring rolls into the hot oil. Fry for 3-4 minutes until they are evenly browned. Don’t overcrowd the pot, you do not want the oil to cool down and absorb into the spring rolls. Once the spring rolls are golden brown, remove them and place them on the paper towels to drain. If the spring rolls appear to be browning very quickly, reduce heat slightly. Continue frying the remaining spring rolls and draining on the paper towel lined baking sheet. Serve with your favorite sweet chili sauce! notes You can add bean sprouts or chopped water chestnuts for additional crunch. If you wish, you can use all pork or all shrimp instead of a mixture. This recipe easily doubles if you want to make a large amount for a party. Spring roll wrappers are found in the frozen section at Asian supermarkets. You can use the smaller 5” wrappers, just use 1 Tbsp. of filling instead of 2 Tbsp. Do not use the dried rice paper wrappers in the grocery stores! They are used for making fresh spring rolls and will not fry well at all! To Freeze: Spring Rolls freeze very well! Place fried spring rolls in the freezer on a baking sheet. Once frozen, they can be put in a ziploc bag and will keep for about 3 months. To Reheat: Preheat the oven to 350°F. Place spring rolls on a baking sheet and bake for 10-12 minutes or until hot. Serve with your favorite sweet chili sauce! Crispy, Chinese-style spring rolls filled with a savory pork and shrimp filling. Serve these at your next party! Better than takeout! You might also enjoy
Mistletoe Mimosa (Cocktail & Mocktail versions)

I love to entertain during the holidays and start the festivities with a fun cocktail! Mistletoe Mimosas are perfect – 2 ingredients and lots of bubbles will keep you and your guests happy all night!
Savory Sausage and Apple Stuffing
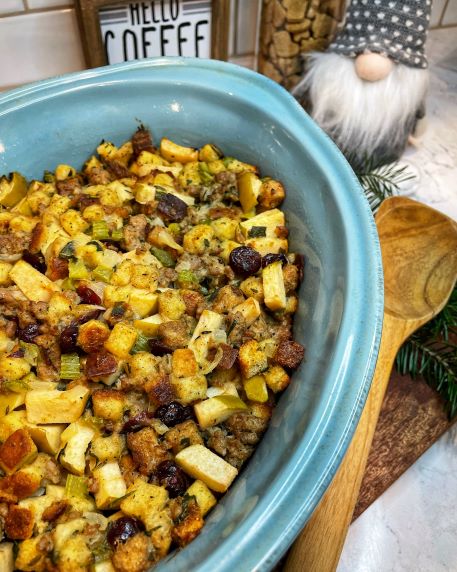
The holiday season has officially begun! I’ve been diligently decorating the house for Christmas and pulling out all of my favorite recipes.(Did I mention I have a lot of favorite recipes? Lol!) One of my favorite comfort foods is this Savory Sausage and Apple Stuffing! I could eat it all by itself! Perfectly seasoned bread cubes and hearty sausage are balanced with pops of fresh, Granny Smith apple and sweet, dried cranberries. It’s a great side dish for any of your holiday meals. Another thing I love about this dish is that you can easily make it a couple days ahead and pop it into the oven when you are ready to entertain! How to Make Savory Sausage and Apple Stuffing Preheat Preheat the oven to 350°F. Grease a 9×13 casserole dish. Set aside. Heat stockpot Heat a large stockpot over medium heat. Add 4 Tbsp. butter. Once melted, add the onion and celery. Sauté Sauté for 2-3 minutes until it starts to soften. Add the sausage. Cook sausage, breaking it up into small pieces until no longer pink. Add seasoning Add the sage, rosemary, thyme, pepper, and parsley. Sauté for an additional 2 minutes. Add the broth and bring to a boil. Combine ingredients Turn off heat and add the seasoned stuffing cubes, chopped apples, and dried cranberries. Toss the stuffing mixture to combine well. Let cool slightly (about 5 minutes) and add the egg. Toss once more to combine. Put in greased dish Pour the stuffing into the greased casserole dish. Cover with foil and bake for 40 minutes. Then uncover and bake for an additional 15 minutes. Prep Ahead You can prepare the stuffing a day ahead (without the egg) and refrigerate. The day of, bake stuffing at 350°F. You may need to bake for an additional 15-20 minutes. Perfectly seasoned bread cubes and hearty sausage are balanced with pops of fresh Granny Smith apple and sweet, dried cranberries! You might also enjoy