Wax Bean and Roasted Tomato Salad with Sun Dried Tomato Vinaigrette
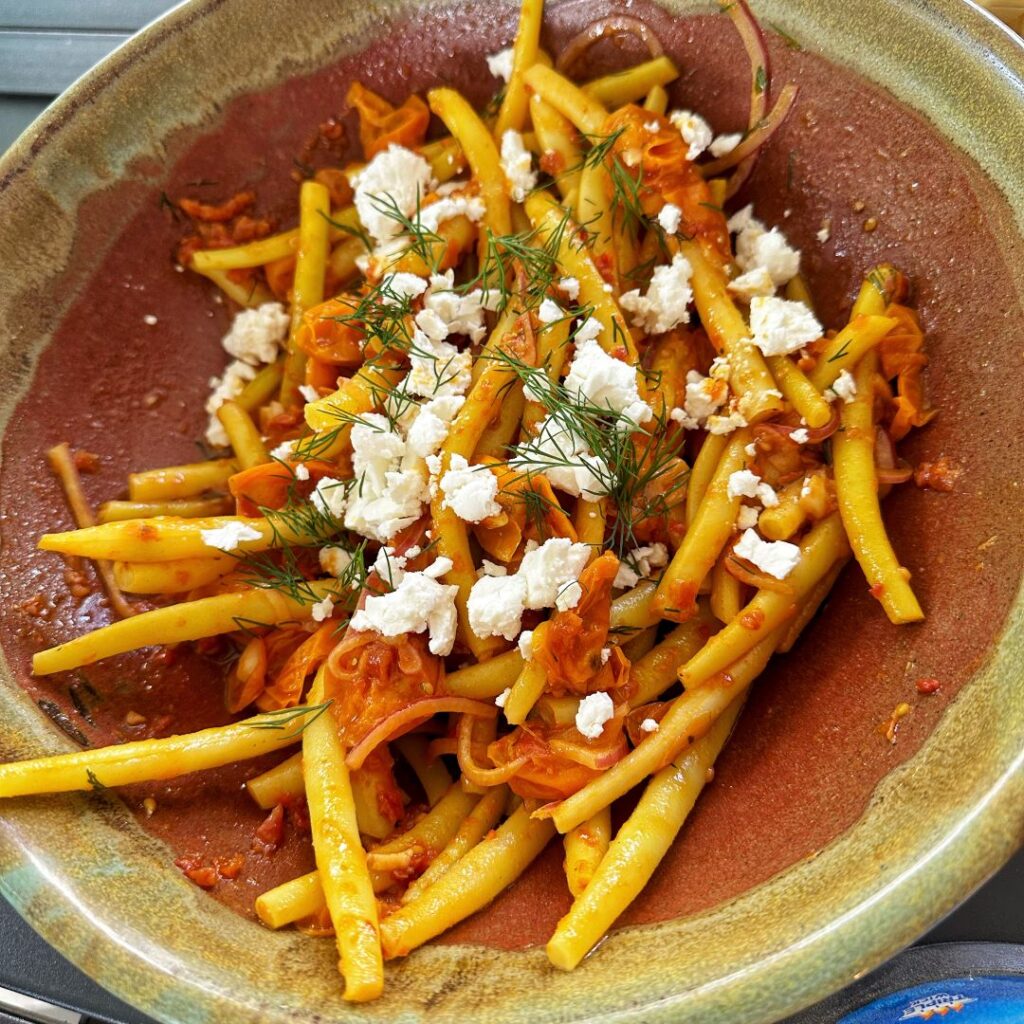
July is when my garden starts to produce a bounty of vegetables. Beans, tomatoes, cucumbers, radishes, peppers, zucchini…I love it! I create recipes (like Wax Bean and Roasted Tomato Salad with Sun Dried Tomato Vinaigrette) based on what the garden gives us for the day. Tender crisp wax beans are tossed with sweet, roasted tomatoes, onion, and fresh dill. Bright sun dried tomato vinaigrette adds tang along with salty crumbles of feta cheese. The perfect summer salad! Wax Beans – They’re not waxy I grew up eating wax beans but they seem to not be as readily available as they used to in the past. Wax beans are closely related to green beans. They do not have chlorophyll which gives them a bright yellow color instead of green. The taste is almost identical. For more information, check out this brief article from The Spruce Eats. Roasted Cherry Tomatoes It seems like cherry tomatoes ripen all at once. You go from no tomatoes to large bowlfuls overnight. When that happens, I love to roast them. Roasting deepens the flavor and brings out the sweetness. Roasted cherry tomatoes also make an awesome, easy pasta sauce! Check out my Creamy Roasted Tomato Sauce! When you combine tendercrisp wax beans and sweet, roasted cherry tomatoes – then the magic happens! It is a beautiful blend of flavors that is ramped up with the tangy Sun Dried Tomato Vinaigrette. Your taste buds are in for a treat! Perfect alongside grilled chicken! If you can’t find wax beans, use green beans. The important thing is to make sure your ingredients are fresh! How to Make Wax Bean and Roasted Tomato Salad with Sun Dried Tomato Vinaigrette Dressing Combine Combine all the ingredients in a food processor or blender. Pureé until smooth. Season with salt and pepper to taste. Set aside. Salad Preheat Preheat the oven to 425°F. Line a rimmed baking sheet with parchment paper. Halve the cherry tomatoes and spread out on the baking sheet. Drizzle with olive oil and sprinkle with Italian seasoning. Toss to coat. Roast Roast for 20-25 minutes until the tomatoes start to blister and slump. Let cool for 5-10 minutes. Blanch While the tomatoes are roasting, bring a large pot of water to a boil. Add the wax beans and cook for 3-5 minutes until tender crisp. Drain into a colander and rinse with cold water to stop the cooking process. Assemble Toss In a large bowl, add the blanched wax beans, roasted tomatoes (and their juices), red onion, and fresh dill. Add the sun dried tomato vinaigrette and toss well. Let the salad sit for an hour to allow the flavors to meld. Right before serving, sprinkle the top with the feta cheese. Refreshing twist on a bean and tomato salad! Tender crisp wax beans with sweet, roasted cherry tomatoes tossed with a tangy vinaigrette and topped with bright feta cheese and fresh dill. You might also enjoy
Blueberry Rhubarb Turnovers
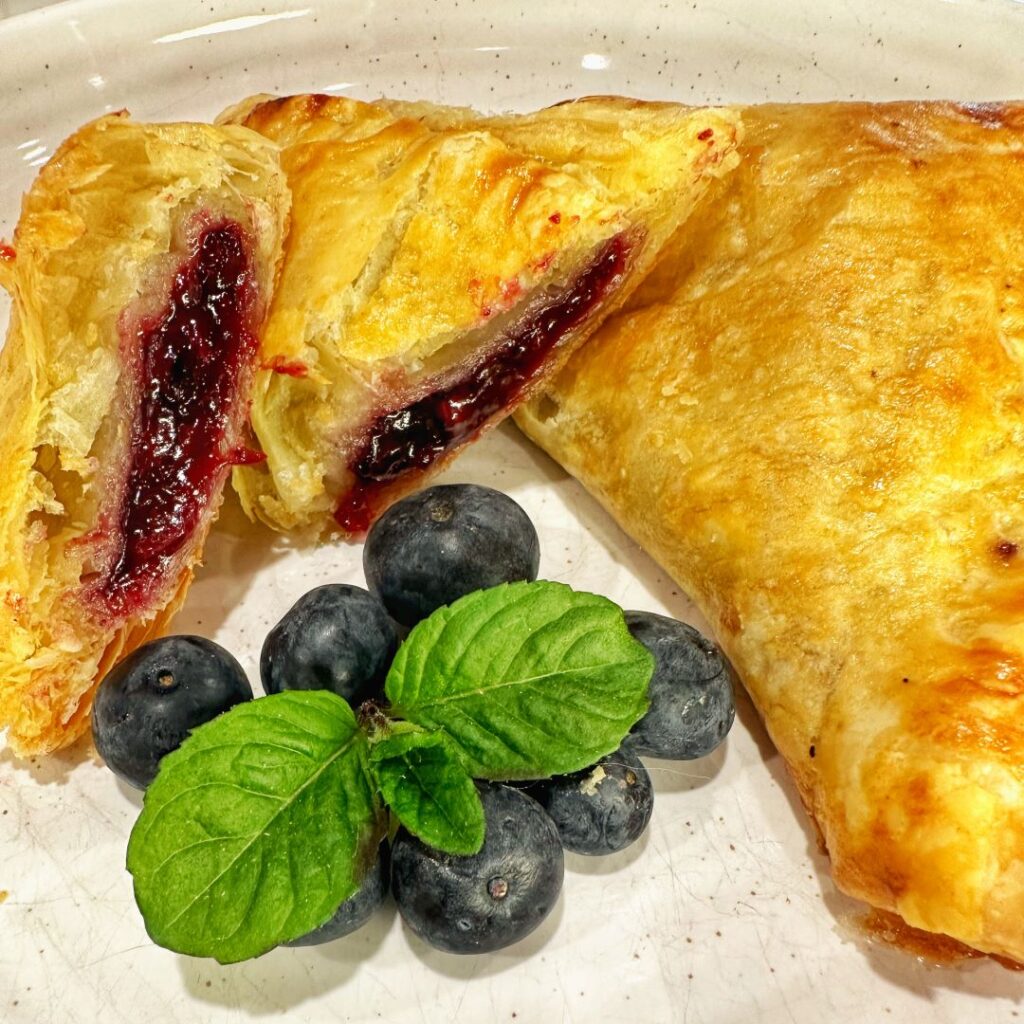
Summertime is all about easy desserts that take advantage of the beautiful fruit that is in season! Right now, blueberries and rhubarb are ready – perfect for making Blueberry Rhubarb Turnovers! What is rhubarb? Rhubarb is a spring vegetable with large leaves that look somewhat like a giant zucchini plant. The only part that is edible are the stalks, which can be green or a vibrant pink. Raw, it is very sour. But once cooked with sugar, it tames down to a pleasant tartness. It pairs well with various fruits like strawberries, blueberries, and cherries. Turnovers Blueberry Rhubarb Turnovers are super easy and will impress all of your family and friends! You can make the filling a few days ahead of time. Then prep the turnovers earlier in the day and keep them in the fridge until you are ready for dessert. Then, just pop them in the oven for 20 minutes and they are ready to go! Beautiful pastry is puffed and golden brown with the blueberry rhubarb filling oozing out. Serve it with a side of vanilla ice cream to make it ala mode! YUM! How to Make Blueberry Rhubarb Turnovers Prepare filling: In a medium saucepan, mix together the blueberries, rhubarb, sugar, cinnamon, and lemon juice. Cook over medium low heat until the blueberries and rhubarb have softened and are bubbly. Add in the cornstarch mixed with water. Simmer for an additional 2-3 minutes until thick. Take off the heat and let it cool slightly. Prepare the Puff Pastry: Thaw the puff pastry dough according to package directions. There will be two sheets in the box. Take each sheet and lay it out flat. Use a sharp knife or pizza cutter to cut each sheet into 4 equal sized squares. You will have 8 total. Prepare the Turnovers: Preheat the oven to 375°F. Put a heaping tablespoon of blueberry rhubarb filling in the center of each square. Do not overstuff! Brush the edges of the puff pastry with the egg wash and fold over diagonally to form a triangle. Use a fork to firmly seal the edges. Place the turnovers on two baking sheets lined with parchment paper. Brush the egg wash on the top of each turnover. Sprinkle it with coarse sugar. Place in the oven for 20-25 minutes until the puff pastry is golden brown. Serve warm and enjoy! You May Also Like
Smoked Chicken with Spicy Maple Bourbon BBQ Glaze
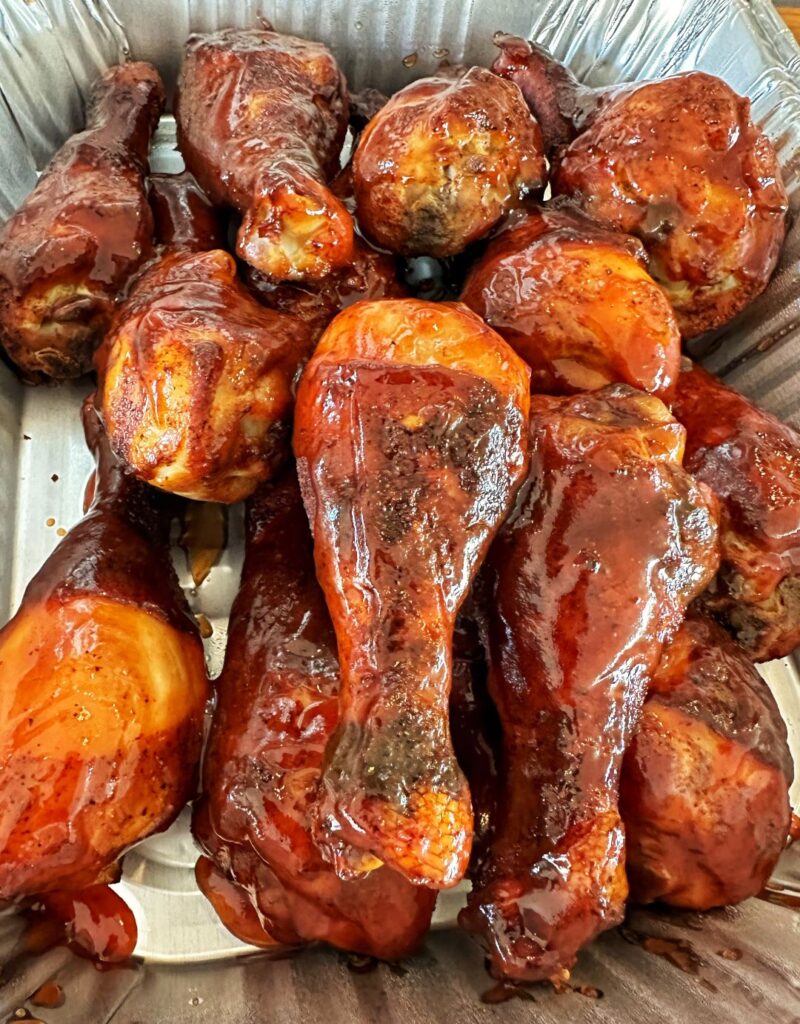
With Father’s Day just around the corner, I wanted to share one of our favorite smoker recipes! Smoked Chicken with Spicy Maple Bourbon BBQ Glaze screams summer BBQ! Chicken is smoked to perfection using a combination of hickory and apple wood and then generously slathered with BBQ Glaze. The chicken is fall off the bone tender and the glaze perfectly balances the smokiness of the chicken with sweet heat. This is the kind of meal where you sit down at the table with a napkin tucked into your shirt and when you are done, you are licking your fingers! It’s THAT GOOD! What If I Don’t Have a Smoker? Not a problem! You can follow the same recipe and grill the chicken instead! Heat your grill to medium and cook your chicken, turning it often. Cooking time will decrease to about 40-45 minutes. And, as always, check the internal temperature of your chicken and make sure it is 165°F. Baste during the last 15 minutes to caramelize the glaze. Can I Just Bake the Chicken in the Oven? Yes, you can! Line a large, rimmed baking sheet with foil and preheat the oven to 375°F. Bake the chicken for 35-45 minutes until the juices run clear and the internal temperature is 165°F. Baste the chicken 2-3 times during the last 15 minutes of baking to caramelize the glaze. How to Make Smoked Chicken with Spicy Maple Bourbon BBQ Glaze Prep Chicken Pat chicken dry and place on a large tray.Sprinkle liberally with the dry rub, coating both sides. Cover and refrigerate for an hour up to overnight to allow the dry rub to season the chicken. When you are ready to smoke the chicken, bring it out of the refrigerator and set on the counter for 30 minutes to allow it to come to room temperature. Preheat Smoker Preheat the smoker to 225°F. Add wood chips (I use a combination of hickory and apple.). After one hour you will add one more tray of wood chips. More than that and your chicken will be overpowered by the smoke flavor. Smoke the Chicken Place the chicken on the racks and smoke for 2 hours or until the internal temperature reads 165°F. Prep the Sauce While the chicken is smoking, prepare the spicy maple bourbon BBQ glaze. In a medium bowl, mix together all of the ingredients. Assemble When the chicken is done, remove from the racks and place on a large platter. Generously baste the chicken with the BBQ glaze while it is still hot. Serve immediately and enjoy! Recipe Notes You can easily halve this recipe for 4 people! Smoky, juicy chicken generously glazed in a spicy maple bourbon BBQ glaze. Perfect picnic food! You might also enjoy
Perfect Polish Cucumber Salad
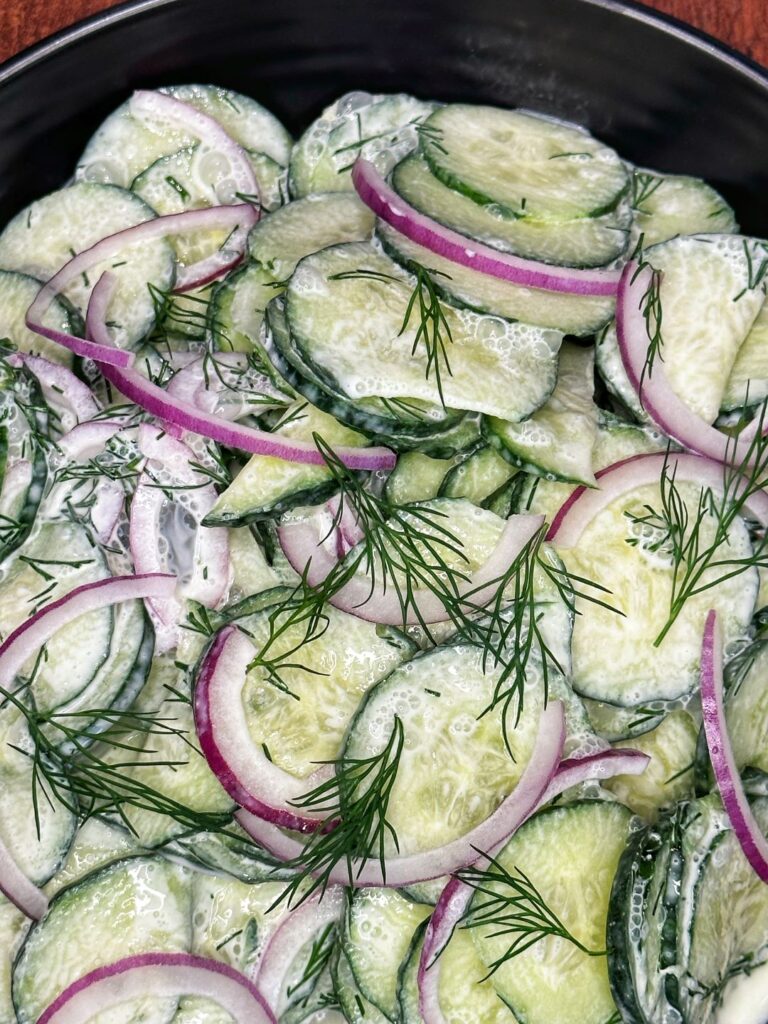
I love a good cucumber salad at picnics and Perfect Polish Cucumber Salad is one of them! This salad is very light and refreshing – filled with crunchy, thinly sliced cucumbers, a tangy, creamy dressing and lots of fresh dill. When you are eating those delicious grilled burgers and wonderful smoked ribs, this salad goes wonderfully and balances out the heavier foods. The other great thing about this salad is it only takes 10 minutes to make! Quick and easy – it’s great for entertaining or bringing to your next potluck dinner. How to Make Perfect Polish Cucumber Salad Slice Use a mandoline or sharp knife to thinly slice the cucumbers. Place the cucumber slices in a colander over the sink and toss with 1 teaspoon of salt. Let it rest for 10 minutes to allow the cucumbers to release extra liquid.This will help the cucumbers to stay crisp and avoid watery dressing. Dressing While the cucumbers are draining, make your dressing. In a large bowl, add sour cream, lemon juice, vinegar, sugar, salt and pepper. Whisk together. Taste and adjust seasonings as needed. Add in the red onion and chopped fresh dill. Mix well. Combine Drain off the excess liquid from the cucumber slices and add them into the bowl. Toss together well. Cover and refrigerate for an hour to allow the flavors to blend together. Serve When you are ready to serve, stir the cucumbers to make sure everything is well combined. Pro Slices To make your life easier, use a mandoline or the slicing disc on your food processor to quickly slice your cucumbers. English cucumbers have very thin skins so there’s no need to peel them. Regular Cukes If you do use regular salad cucumbers, make sure to peel them first. The skins are much thicker and usually coated with wax to ensure freshness. Fresh Dill Use the fresh dill! When you make a salad with only a few ingredients, you want those flavors to SHINE! CAn I use greek yogurt instead? The quick answer is YES! Greek yogurt is a tad thicker than sour cream though, so if it appears too thick, you can thin it out with a teaspoon or two of milk. This cucumber salad is light and refreshing, the perfect side dish for grilled meats. Light, refreshing, filled with crunchy cucumbers, tangy dressing, and lots of fresh dill! You might also enjoy
Vietnamese Noodle Bowls
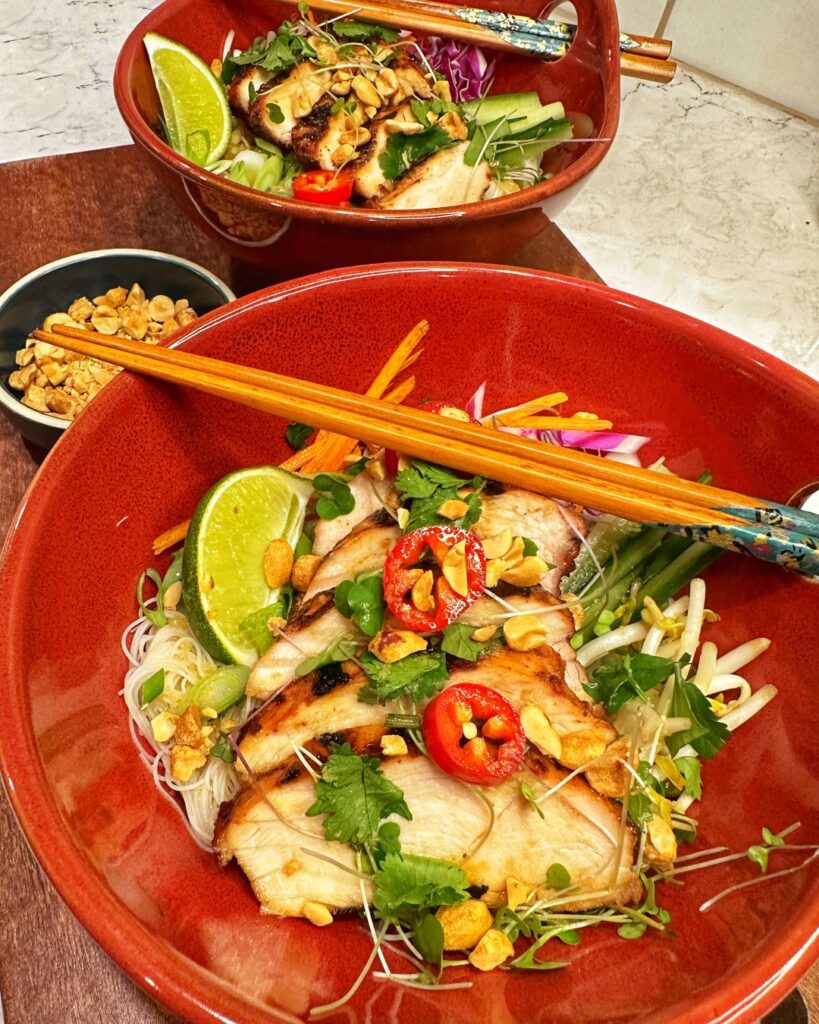
My Vietnamese Noodle Bowls are a version of traditional Vietnamese bún. It’s a cold salad with rice noodles, grilled chicken, fresh vegetables and herbs, topped with an addictive tangy rice vinegar dressing and crunchy roasted peanuts. I originally saw this recipe several years ago on Vietnamese-Style Noodle Bowls with Chicken from Simply Recipes and have since adapted it to my family’s tastes. This is one of our go-to noodle dishes in the summer! It is so refreshing, it’s a complete meal in a bowl, and is great to pack for meal prep (If there are any leftovers)! The textures and flavors are so satisfying. The soft noodles, crisp veggies, tangy dressing, smoky grilled chicken, and crunchy peanuts covers all the bases! Tips For a Great Noodle Bowl Dressing: The dressing is almost the same as your traditional Nuoc Cham (Vietnamese Sauce). You want to make sure you use seasoned rice vinegar for this recipe. If you use plain rice vinegar, just add a bit more sugar and salt to taste. You want it tangy, not tart. Noodles: You can find rice vermicelli noodles at most grocery stores or your local Asian market. Make sure you follow the directions on how to make the noodles – most are usually soaked in hot water for 3-5 minutes, then drained. You want to rinse them in cold water right away to stop the cooking process. The noodles should have a nice bite to them. No one wants to eat soggy noodles! Vegetables: The great thing with many Asian dishes is the flexibility. You do not have to use the exact same vegetables that I have on my list. Use what you like, have available and is fresh at your market. As long as you have about 3-4 cups of vegetables, you will have enough for 4 servings. Try to go for color and texture – you want your noodle bowl to look appealing! . Prep Tips: To save time, you can make the dressing ahead of time and prep all of the veggies earlier in the day. Then, when you are ready to eat, you just have to grill the chicken and cook the noodles, and assemble! How to Make Vietnamese Noodle Bowls Make the dressing: Combine the dressing ingredients in a small saucepan. Warm over medium heat, stirring often. Heat just until the dressing begins to bubble, then remove from heat and allow to cool to room temperature while you prepare the rest of the noodle bowl. Chicken: Combine the hoisin and oyster sauce in a shallow dish. Coat the chicken with the sauce. Heat the grill to medium, oil the grates, and add the chicken. Grill for 3-4 minutes on each side until the internal temperature is 165°F. Remove chicken from heat and tent for 5 minutes before slicing. Noodle Bowl: Prepare all of your vegetables and set aside. Cook the noodles according to package directions. Drain and rinse in a colander. Divide the noodles equally into 4 bowls. Arrange the vegetables around each bowl, adding the sliced grilled chicken. Drizzle with a few spoonfuls of the dressing. Garnish with cilantro and chopped peanuts. Serve with a lime wedge and extra dressing on the side. Refreshing noodle bowl with grilled chicken and fresh vegetables tossed with a rice vinegar dressing. Recipe Notes *Adapted from Vietnamese-Style Noodle Bowls with Chicken from Simply Recipes You might also enjoy
Thai Summer Rolls with Peanut Dipping Sauce
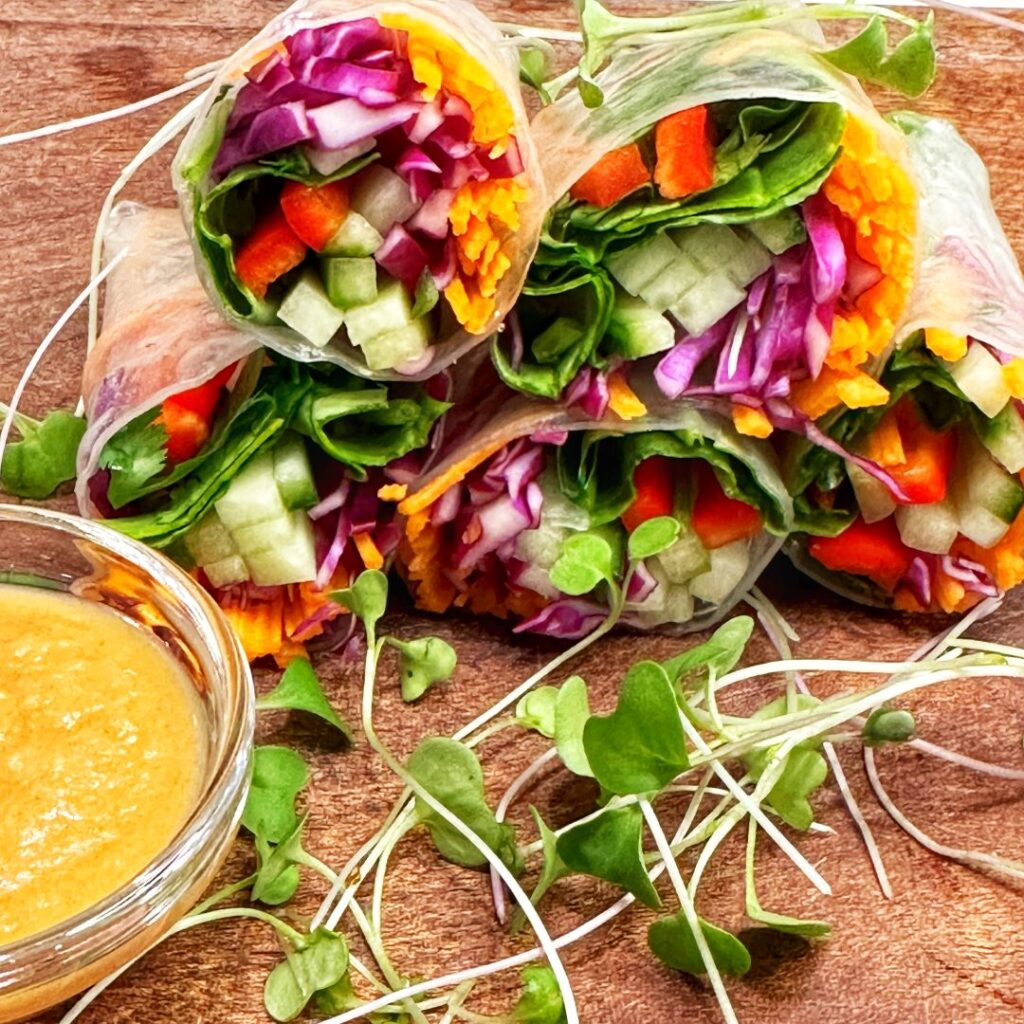
Thai Summer Rolls are bright, colorful, flavorful, and light! Great for dipping in addictive peanut dipping sauce! Perfect for lunch or for an appetizer. My husband and I eat salads almost every day for lunch. But when the weather gets warm, I change things up so we still get our veggies but in this colorful roll with fun dipping sauce! There is a difference between spring roll wrappers and summer roll wrappers… When I first started making spring rolls and summer rolls, I didn’t realize that the wrappers were COMPLETELY different! I saw the semi-transparent spring roll rice wrappers in the Asian section of the grocery store and thought they were the ones you fry up to make those lovely, crispy spring rolls you get at any good Asian restaurant. I was disappointed (to say the least) when I attempted to wrap, then fry the rice wrappers. They crumbled, were greasy, and were pretty much…terrible. Then I learned that the spring roll wrappers were actually in the FROZEN section, NOT the Asian section. Whoops! Learning curve… Once I learned that, I realized that rice paper wrappers (AKA spring wrappers) are really for summer rolls. You briefly soak them in warm water, then working quickly, you add your favorite fillings (like noodles, veggies, or shrimp), roll and then voilà! Delicious summer rolls! Since then, I love to make them in the summer. There’s something about the chewy rice paper, crunchy veggies, and that delicious peanut sauce that just makes your mouth happy! Try them soon! You won’t regret it! Yum! How to Make Thai Summer Rolls with Peanut Dipping Sauce rice paper wrappers Clean and prep all of the vegetables. Fill a shallow bowl or round cake pan with an inch of warm water. Lay a lint-free towel next to the bowl. Dip one rice paper into the warm water for 3-4 seconds. It will be slightly stiff but will continue to soften as you make your roll. Lay the wrapper on the towel. Add the filling Starting 1 inch away from the edge, layer the ingredients to cover about ⅓ of the wrapper. A small handful of baby spinach, a pinch of cabbage, carrots, pepper, cucumber, and micro greens. Add a good pinch of the fresh herbs. Roll them up! Fold the lower edge up over the vegetable filling, gently but firmly tucking the roll under and away from you. When you are ⅔ of the way folded, fold the ends into the roll and continue rolling until the roll is finished. Place on a dish and continue rolling the rest of the rolls. Try to keep the rolls separate as they will stick together. Peanut Dipping Sauce In a small bowl, whisk together all of the sauce ingredients except the water. It will be very thick and clumpy at first. Add water, a tablespoon at a time, as needed, to the sauce to make it creamy and dippable. Serve Serve the summer rolls with the peanut dipping sauce on the side. You can serve them whole or slice in half. Fresh summer rolls with colorful veggies and herbs, wrapped in rice paper and served with peanut dipping sauce. Absolutely delicious! You might also enjoy
