Blueberry Rhubarb Crumb Pie
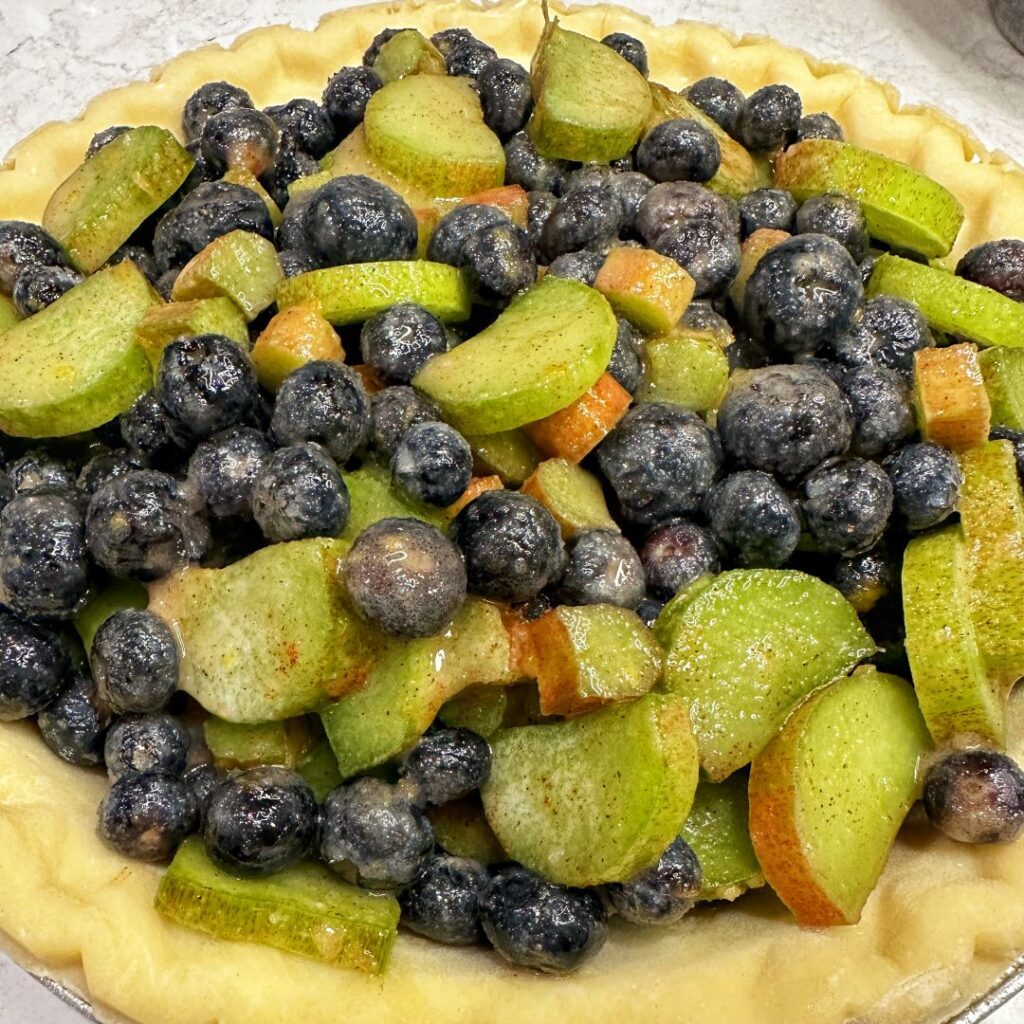
I love this time of year when fresh fruits and vegetables start to be in season! Right now, blueberries and rhubarb are readily available. Perfect for making Blueberry Rhubarb Crumb Pie! Juicy, sweet blueberries and tart rhubarb complement each other perfectly in this pie! With a thick crumb topping, it is downright indulgent. Rhubarb? Living in the Northeast, there are many Pennsylvania Dutch recipes for rhubarb. Stewed rhubarb, strawberry rhubarb pie, rhubarb coffee cake, strawberry rhubarb jam, rhubarb custard pie. You get the idea! If you have never had it, it is a very large leafy plant with thick stalks that are green with rosy streaks. The leaves are not edible, but the stalks can be used for several dishes. If you eat it raw, it will be very sour and crunchy. But once cooked, it gets very soft and the sourness mellows to a pleasant tartness that pairs wonderfully with sweet blueberries or strawberries. Pie Crust – Homemade vs. Store Bought I confess that although I prefer EATING pie with homemade crust, I tend to BUY pre-made pie crust to save time. That being said, for this recipe, I use a frozen deep dish pastry crust because it is a bit thicker than regular pie crust and holds up to the juiciness of the filling. No soggy crust here – it’s nice and flaky! How to Make Blueberry Rhubarb Crumb Pie Prepare Filling Preheat the oven to 375° F. In a large bowl, mix together the blueberries, rhubarb, sugar, cornstarch, cinnamon, lemon zest, and lemon juice. Combine well and set aside for 10-15 minutes to allow the juices to moisten the filling. Prepare the Crumb Topping: In a medium bowl, whisk together the flour, white and brown sugars, and cinnamon. Drizzle the melted butter over the dry ingredients and stir together with a fork until all the butter is absorbed and it starts to clump. Prepare the Pie: Pour the filling into the deep dish pie crust. Sprinkle the crumble mixture evenly over the top. Place a pie shield on the edges to prevent over-browning (you can also use aluminum foil). Place on a rimmed baking sheet to catch any spilled juices while baking before putting in the oven. Bake Bake for one hour. Check to see if the crumb topping is golden brown and the filling is hot and bubbling, including in the center. You may need to bake for an additional 10-20 minutes depending on your oven. Cool Remove from the oven and cool for at least 4-5 hours or overnight before serving. You want to give the filling time to cool and firm up so it isn’t soupy. Cover the pie tightly and store in the refrigerator for up to 5 days. Homemade pie bursting with juicy, sweet blueberries and tart rhubarb. Topped with a crunchy, cinnamon crumb topping! You might also enjoy
Cherry Old Fashioned
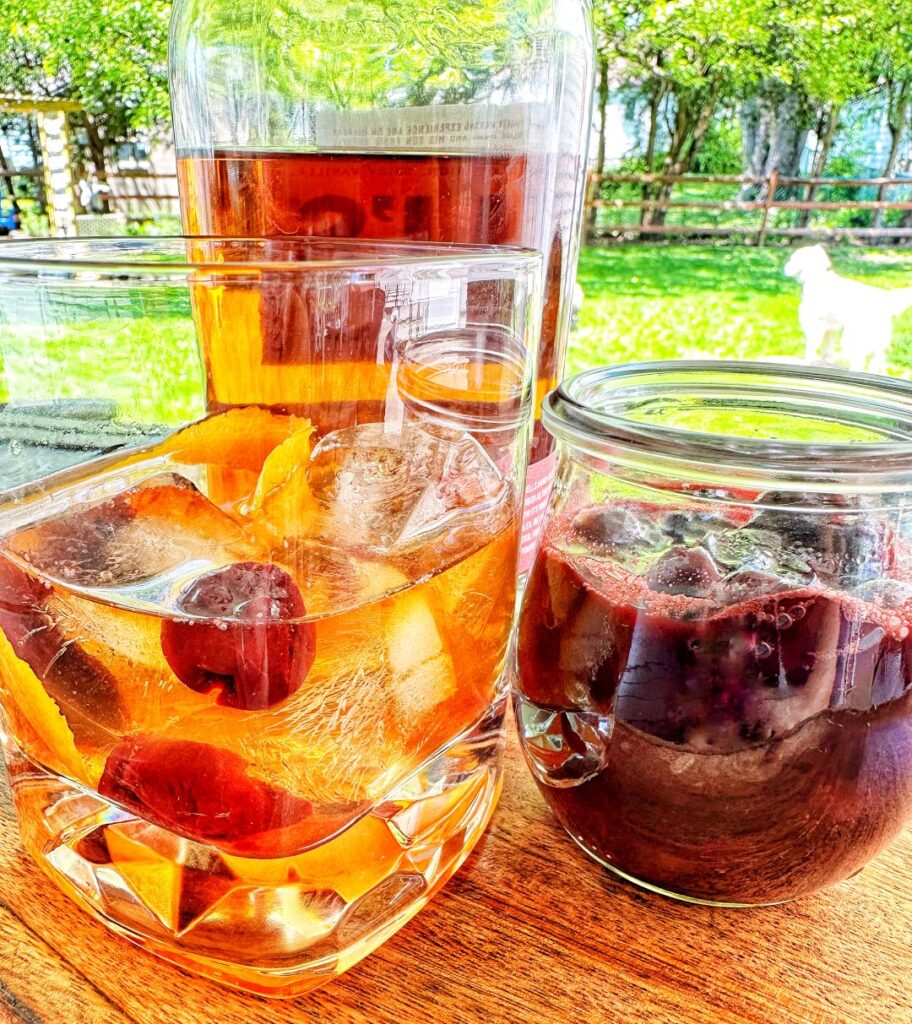
This is my spin on a Cherry Old Fashioned! My husband and I were out for date night and stopped at one of our local distilleries for drinks. He ordered an Old Fashioned and absolutely loved it! And while they would not share the exact recipe, they did share the ingredients. The secret ingredient? Wine soaked cherries. When we got home, I began experimenting to try to recreate the drink. After a couple tries (that my husband enthusiastically tested for me), I came up with my own version that he liked even better! So if you are looking for a fun cocktail to make for your next picnic – look no further! Just make sure you use a good quality bourbon! Some of our favorites are Basil Hayden, Russell’s Reserve, and Penelope. Enjoy! How to Make a Cherry Old Fashioned Combine Combine the bourbon, turbinado syrup and bitters in a shaker with ice. Shake Shake until well chilled. Add Add the wine soaked cherries and a large ice cube to a rocks glass. Strain Strain the bourbon into the rocks glass and garnish with an orange peel. Turbinado Syrup Combine 1 cup turbinado sugar with ½ cup of water in a small saucepan. Warm over medium heat, stirring occasionally until the sugar is dissolved. Turn off heat and let cool. Pour into a container and refrigerate until ready to use. Turbinado Sugar Turbinado sugar is also known as sugar in the raw even though it isn’t raw. It is a coarse sugar that is light brown with traces of molasses. It has a well-rounded, richer flavor than white granulated sugar. You can find it in the baking section of most grocery stores. A slightly sweeter version of the classic Old Fashioned with wine soaked cherries. Perfect sipper on a summer day! You might also enjoy
Wine Soaked Cherries
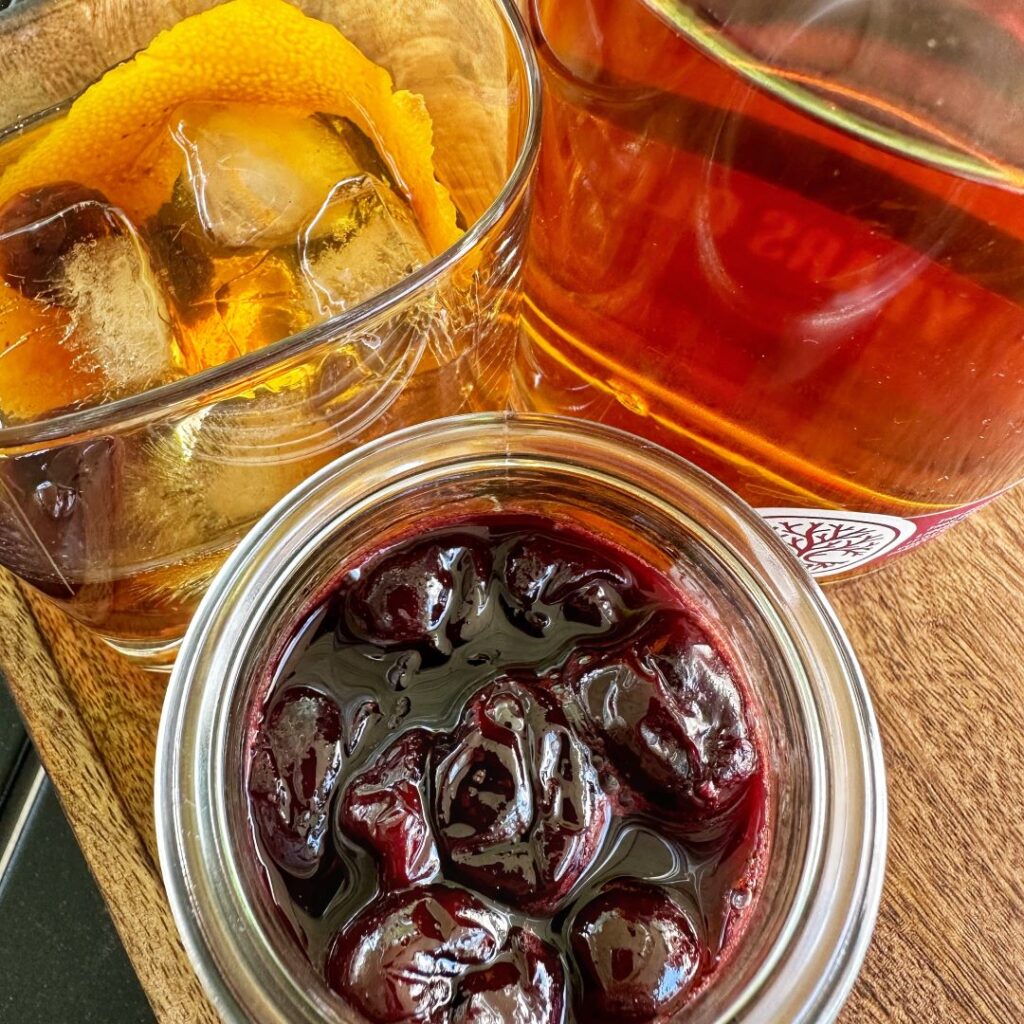
My husband loves to challenge me to come up with new recipes but always at random times. For instance: wine soaked cherries. Lol! We were out for drinks a couple weeks ago and he absolutely loved the Old Fashioned he had at our local distillery. When he asked the bartender what was in it, he found out it had red wine soaked cherries. Immediately, he got that twinkle in his eyes and asked – can you make wine soaked cherries??? My answer? Sure! Challenge Accepted So, the next day, I was researching and found a couple recipes I liked. I played with them a bit, changing amounts and flavors until I got the combination I thought he would like best. Guess what? He was thrilled! He liked my version even better than the one he had on date night. Of course, he also knows – happy wife, happy life – hahaha! Wine Soaked Cherries for the win! Anyway, I’m happy to share this recipe with you. The red wine and vodka will cook down (and the alcohol will cook off) leaving you with rich, wine infused cherries that are absolutely delicious! They are great for Cherry Old Fashioneds and would be fabulous drizzled over ice cream or as a great addition to your charcuterie board! They are the perfect balance of sweet and syrupy to complement your favorite drinks and desserts! How to Make Wine Soaked Cherries Place all of the ingredients (cherries, sugar, red wine, vodka, and vanilla) into a small saucepan and heat gently, stirring occasionally. Bring to a boil and then reduce the heat to a simmer for 10 minutes. Let the liquid cook down and reduce. It will become syrupy and glossy. Take the saucepan off of the heat and let the cherries cool. Pour into a small glass container with a tight-fitting lid and refrigerate. Sweet cherries in a red wine syrup are perfect for cocktails, desserts, and charcuterie boards! You might also enjoy
Creamy Potato Salad
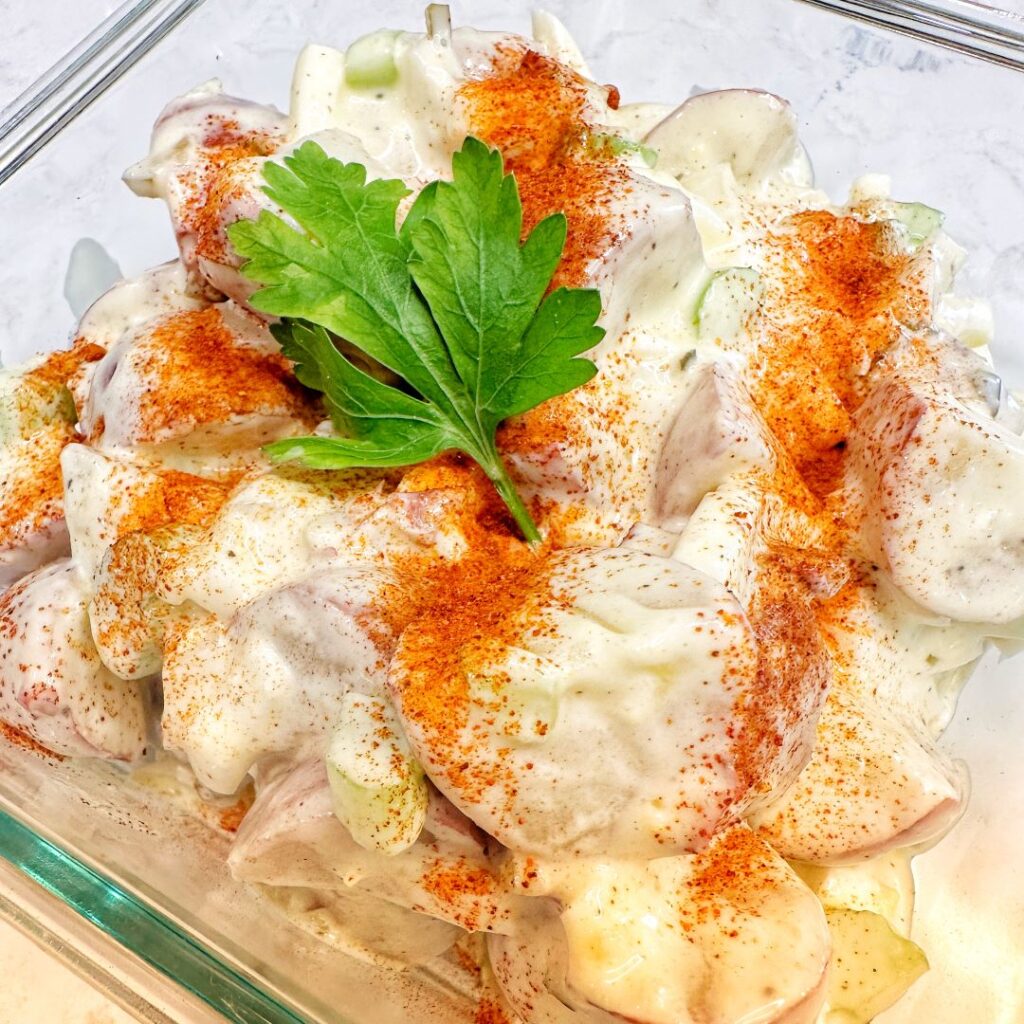
It’s picnic season and time for one of my favorites – Creamy Potato Salad! This classic recipe has all the yummy flavors! It is a perfect blend of creamy baby potatoes, crunchy celery and onions, and hard boiled eggs, lightly tossed with a tangy dressing. potato Salad? For many years, I was not a potato salad fan. At all. Then, I had an amazing potato salad at a church picnic. No mealy potatoes. Instead, the potatoes were creamy and the dressing? Perfectly balanced with tangy mayo and vinegar but with a touch of sweetness. I begged the older church member for her recipe. She gladly shared it with a twinkle in her eyes. But… Old recipes – are not exact. They are more like guidelines. A handful of this, a pinch of that. You have to play with the recipe to coax it to taste the way you envision it. Now, I understood why she had a twinkle in her eyes. So, after experimenting a few times, I finally came to this recipe and I love it! One tip – if you have time, make it the day before. The flavors blend and the potatoes have time to soak in all that goodness, making it taste great! How to Make Creamy Potato Salad Cook Fill a stockpot with salted water, the potatoes, and the eggs. Heat on high to bring to a boil, then reduce heat to medium and cook for approximately 12-15 minutes until potatoes are fork tender. Drain and let the potatoes and eggs cool. Prep While the potatoes and eggs are cooking, prepare the rest of the salad. Dressing In a large bowl, whisk together mayonnaise, apple cider vinegar, sugar, mustard, salt, garlic powder, and black pepper. Add the diced celery, onion, and sweet pickle relish. Stir to combine. Chop Cut the baby potatoes into bite size pieces. Add to the dressing and toss to thoroughly coat. Peel and chop the eggs. Add to the bowl and gently fold into the salad until combined. Refrigerate Put the potato salad into your serving dish. Sprinkle with paprika and garnish with fresh parsley if desired. Cover and refrigerate for at least 2 hours to allow the flavors to combine. I like to make this a day ahead for easy entertaining. You might also enjoy
Black Bean and Corn Salad
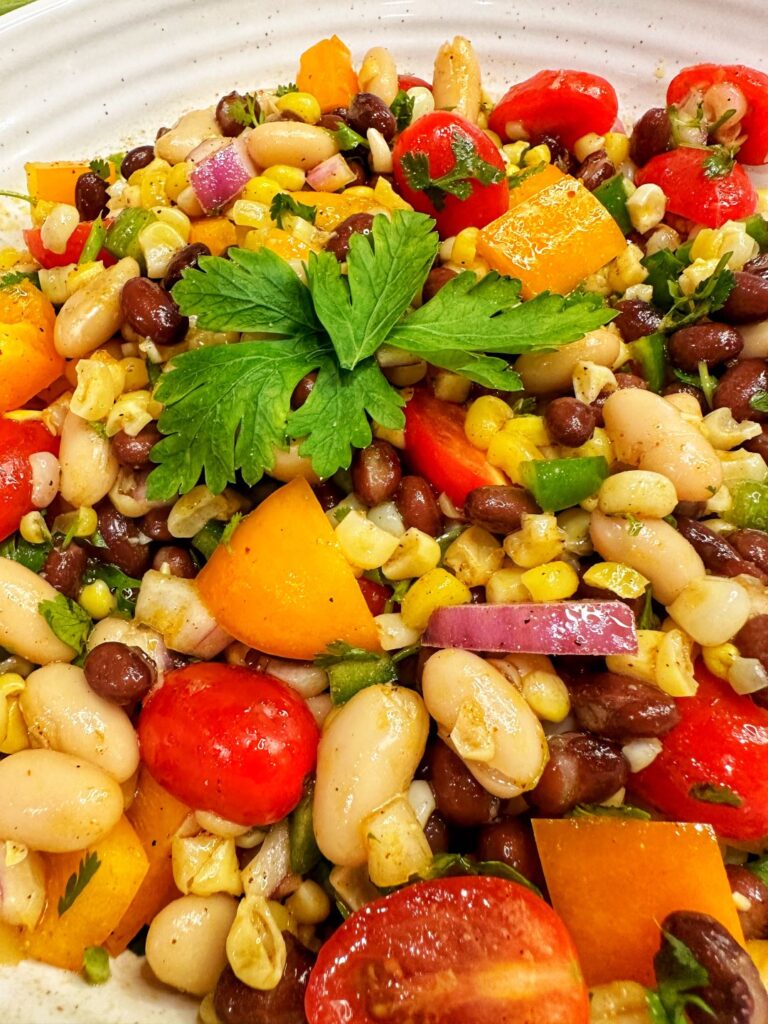
With Memorial Day around the corner, I was going through my favorite picnic recipes trying to decide which ones to share with you all. Black Bean and Corn Salad popped out at me! This salad hits all the right notes for a perfect side dish at a picnic. Colorful, crunchy veggies, creamy beans, and a refreshing, tangy lime dressing. Great as a side for some grilled chicken, steak, or serve as a chunky dip with some tortillas! I love this salad because it is so versatile and easy to make. Just browse through your pantry items and use what you have available. You can swap out the cannellini beans for a second can of black beans or pinto beans, add in fresh, diced avocado, or even add some fresh mango! 15 minutes and you are out the door and on your way to the picnic with an awesome dish! How to Make Black Bean and Corn Salad Place all of the salad ingredients into a large bowl. Toss lightly to mix. In a small bowl, add the olive oil, lime juice, honey, and spices. Whisk together. Pour the dressing over the salad and fold it in until well combined. You can serve this salad immediately or refrigerate until ready. Serving Suggestions: Recommended: With Memorial Day around the corner, I was going through my favorite picnic recipes trying to decide which ones to share with you all. Black Bean and Corn Salad popped out at me! This salad hits all the right notes for a perfect side dish at a picnic. Colorful, crunchy veggies, creamy beans, and a refreshing, tangy lime dressing. Great as a side for some grilled chicken, steak, or serve as a chunky dip with some tortillas! I love this salad because it is so versatile and easy to make. Just browse through your pantry items and use what you have available. You can swap out the cannellini beans for a second can of black beans or pinto beans, add in fresh, diced avocado, or even add some fresh mango! 15 minutes and you are out the door and on your way to the picnic with an awesome dish! How to Make Black Bean and Corn Salad Prepare all of your ingredients. Chop all of the vegetables. Place all of the salad ingredients into a large bowl. Toss lightly to mix. Dressing In a small bowl, add the olive oil, lime juice, honey, and spices. Whisk together. Assemble Pour the dressing over the salad and fold it in until well combined. You can serve this salad immediately or refrigerate until ready. Serving Suggestions: Great alongside grilled steak. Serve with BBQ chicken. Or serve as a dip with your favorite tortilla chips. Colorful, crunchy veggies, beans, and a tangy lime dressing makes for an easy and refreshing side dish! You might also enjoy
TikTok Upside Down Apple Tarts
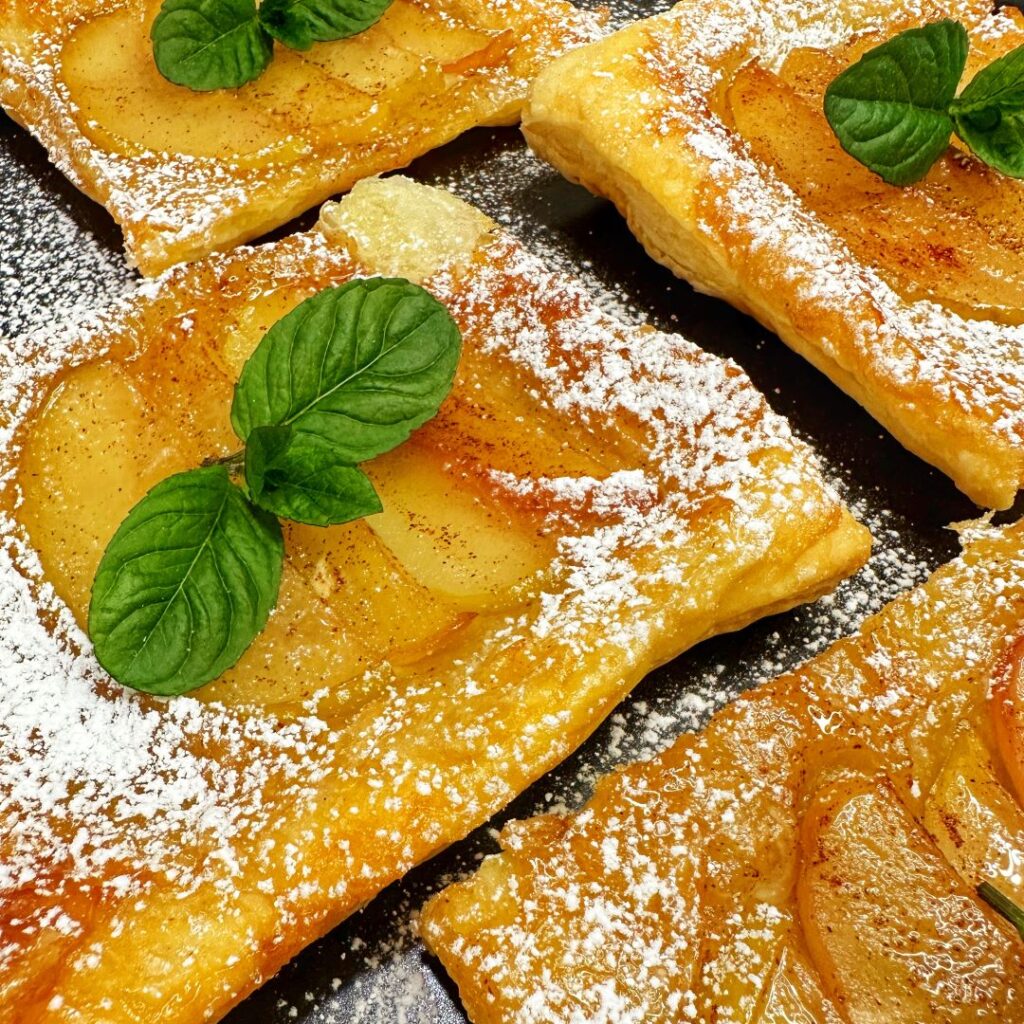
I saw one of the new viral TikTok recipes on social media and thought it would be perfect for Mother’s Day brunch! TikTok Upside Down Apple Tarts are quick, easy, elegant AND delicious! Viral TikTok Upside Down Apple Tarts Recipe When I saw other bloggers making this, I thought to myself, this is SOOO Easy BUT does it taste good? I tried the viral cottage cheese ice cream and that was an epic fail so I was a bit skeptical about the upside down tarts. Well…let me tell you…these are DELICIOUS! Flaky pastry with tender apples and carmelized honey dusted with cinnamon – it’s fantastic! The beauty of this dessert is the puff pastry. You really can’t screw up puff pastry. It makes you look like a pro, even when you’re not! I chose to use apples for this dish (because that is what I had in the refrigerator) but any stone fruit would be great too! Plums, peaches, and nectarines would all be great options! I would also like to try fresh pineapple! So let’s make these viral TikTok Upside Down Apple Tarts! How to Make TikTok Upside Down Apple Tarts Preheat Preheat the oven to 400°F. Line a baking sheet with parchment paper. Cut Cut puff pastry into 4 pieces. Thinly slice Thinly slice (⅛”) apples. You will need 4 slices for each tart. Drizzle the honey onto the baking sheet in 4 spots. Sprinkle each honey spot evenly with cinnamon. Lay 4 slices of apple on each spot. Assemble Place the puff pastry square on top of the fruit and honey, gently pressing down to seal the edges. Use a fork to crimp the sides. Mix the egg and water in a small bowl. Brush the puff pastry with the egg wash. Bake Bake for 15-20 minutes until the puff pastry is golden brown. Let the tarts cool for about 5 minutes. Then carefully flip each one over onto a serving plate. Sprinkle the tarts with powdered sugar and serve! Serve Serve with a scoop of vanilla ice cream for an extra treat! Elegant apple tarts are easy to make and sure to impress your guests! You might also enjoy
